Imagine you’ve just returned home after a heavy rainstorm, only to find water pooling in your basement and a musty odor lingering in the air. This scenario highlights the urgent need for mold remediation following water damage. Understanding the step-by-step process can be essential for ensuring your home remains safe and healthy. What steps should you take next to effectively manage this situation and prevent future mold growth?
Key Takeaways
- Identify and eliminate the source of water intrusion to prevent further damage and mold growth.
- Conduct a thorough assessment of affected areas for moisture and visible mold.
- Use dehumidification and ventilation techniques to lower humidity and improve air circulation.
- Remove contaminated materials safely and establish containment barriers to limit mold spread.
- Test air quality post-remediation to confirm effective mold removal and monitor for recurrence.
Why Mold Remediation Is Essential After Water Damage
When water damage occurs, it’s essential to understand that mold can begin to develop within 24 to 48 hours if the affected area isn’t promptly treated.
Addressing mold growth is critical for protecting both your health and your environment. Mold can release allergens and irritants, impacting your overall well-being and potentially leading to serious health issues.
By investing in mold remediation, you safeguard your health and prevent extensive property damage, which can lead to higher remediation costs down the line.
A thorough remediation process ensures mold colonies are effectively removed, allowing you to reclaim your space.
Prioritizing this step affirms your commitment to a safe, healthy living environment for you and your loved ones.
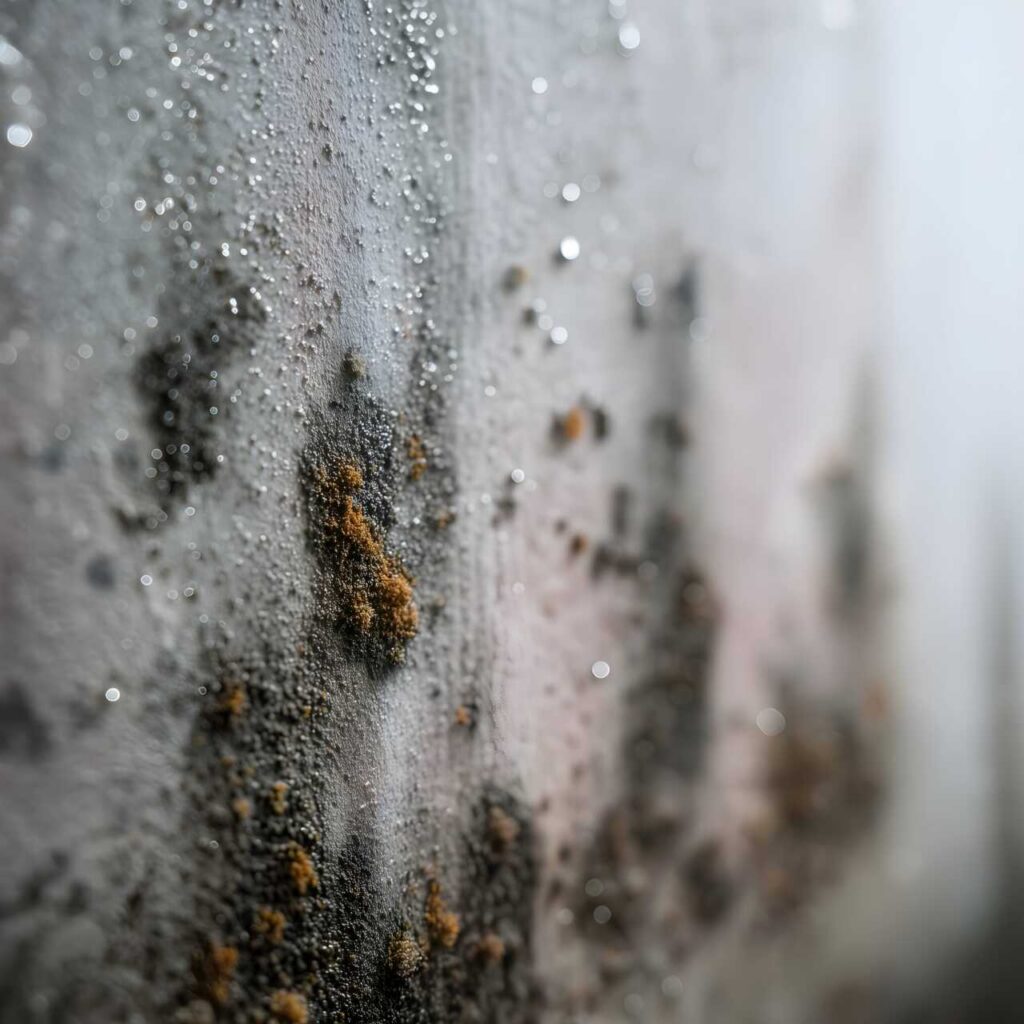
Signs of Mold Growth You Shouldn’t Ignore
Mold growth can manifest in various ways, often going unnoticed until it has escalated. You should be vigilant for these signs: visible mold patches, often black, green, or white, which indicate specific mold types.
Musty odors can also signal hidden growth in walls or floors. Pay attention to water stains or discoloration, as they suggest moisture accumulation, a breeding ground for mold.
If you experience unexplained health issues like respiratory problems or allergic reactions, it might be linked to mold exposure. Recognizing these signs early can mitigate health risks and prevent further damage to your home.
Stay proactive and address any concerns immediately to ensure a safe environment for you and your loved ones.
Evaluating Damage: Your Initial Assessment Steps
To start your assessment, identify the source of the water intrusion to prevent further damage.
Next, inspect all affected areas thoroughly, looking for signs of moisture and structural impairment.
Finally, assess the presence of mold, noting any visible growth or musty odors that may indicate hidden infestations.
Identify Water Source
Identifying the source of water intrusion is essential for effectively addressing mold remediation after water damage. Start by conducting a thorough evaluation of potential water sources.
Check for obvious leaks in plumbing, roofs, and basements. Utilize leak detection methods, such as moisture meters or infrared cameras, to pinpoint hidden issues that may not be immediately visible.
Assess the surrounding environment, including gutters and drainage systems, to ensure they’re functioning correctly. Pay close attention to areas with previous water damage, as they may indicate recurring problems.
Inspect Affected Areas
After pinpointing the source of water intrusion, the next step is to inspect the affected areas thoroughly.
Begin by visually evaluating walls, ceilings, and floors for any signs of damage or discoloration.
Utilize mold inspection techniques, such as swab tests and air sampling, to identify potential mold spores.
Employ moisture detection tools, like hygrometers and infrared cameras, to measure humidity levels and locate hidden moisture pockets within materials.
Document your findings meticulously, noting areas with elevated moisture levels or visible mold growth.
This detailed evaluation helps you understand the extent of the damage and guides your remediation efforts moving forward.
Assess Mold Presence
How can you effectively assess mold presence in your environment? Start by inspecting areas that show signs of water damage, such as walls, ceilings, and flooring. Look for visible mold growth, discoloration, or a musty smell.
Next, consider conducting mold testing to identify specific types of mold and their concentrations. This can be done through surface samples or air quality testing, which helps gauge the overall safety of your indoor environment.
If air quality tests indicate elevated mold spores, it’s essential to address the issue promptly. Document your findings, as this information will guide your remediation process and ensure that you create a safe, healthy space for yourself and your loved ones.
Containment Strategies: Preventing Mold Spread
Since mold can spread rapidly in damp environments, implementing effective containment strategies is crucial to preventing its proliferation during the remediation process.
Start by establishing containment barriers using heavy plastic sheeting to isolate contaminated areas, limiting mold spores’ movement to unaffected spaces. Seal doors and vents to prevent contaminants from escaping.
Utilize air filtration devices equipped with HEPA filters to capture airborne spores, markedly reducing mold contamination risk. Maintaining negative air pressure within the containment area will further prevent spores from migrating.
Regularly monitor air quality to assess the effectiveness of your containment methods. By prioritizing these strategies, you create a safer environment for yourself and others, fostering a sense of belonging and security throughout the remediation process.
How to Remove Moisture to Control Mold
To effectively control mold growth, it’s essential to promptly remove moisture from affected areas.
Start by identifying the source of water intrusion; this could be leaks, floods, or high humidity.
Utilize dehumidification techniques such as portable dehumidifiers or whole-home systems to lower humidity levels below 60%.
Ensure proper ventilation in enclosed spaces by using fans and opening windows to facilitate air circulation.
Additionally, inspect and dry out materials like carpets, drywall, and insulation within 24-48 hours post-exposure.
Monitoring moisture levels with a hygrometer can help you maintain moisture control.
Effective Cleaning and Disinfecting Techniques for Mold Removal
When tackling mold removal, it’s crucial to employ effective cleaning and disinfecting techniques to ensure thorough eradication.
Start by selecting the right cleaning agents that specifically target mold spores. Next, use appropriate disinfection methods to create a safe, mold-free environment.
Here’s a quick guide to follow:
Surface Cleaning: Use a mixture of water and detergent to scrub affected areas. This helps remove visible mold and spores.
Disinfecting Solutions: Apply a solution of one cup of bleach to one gallon of water on non-porous surfaces to kill remaining spores.
Drying: Verify all surfaces are completely dry after cleaning, as moisture encourages mold growth.
Safe Disposal of Contaminated Materials
In the process of mold remediation, you must first identify contaminated materials, such as drywall, carpeting, and insulation.
Once you’ve pinpointed these items, employ proper disposal methods, including sealing them in plastic bags before removal.
Make sure to follow safety precautions, like wearing personal protective equipment, to minimize health risks during this phase.
Identifying Contaminated Materials
Properly identifying contaminated materials is essential for effective mold remediation after water damage. Conducting a thorough material assessment will help you determine the extent of contamination.
Here are three key steps to follow:
Visual Inspection: Look for visible signs of mold growth, such as discoloration or fuzzy patches. Identify different mold types that may be present.
Moisture Testing: Use moisture meters to check the dampness of various materials. High moisture levels can indicate potential mold growth.
Sampling: If mold is suspected, collect samples for lab analysis. This will confirm the presence of specific mold types and inform your remediation strategy.
Proper Disposal Methods
Disposing of contaminated materials is critical to prevent further mold growth and ensure a safe environment. You’ll need to follow proper disposal methods to handle hazardous materials effectively.
Start by sealing any contaminated items, like drywall or carpets, in heavy-duty plastic bags. Clearly label these bags as hazardous to alert others. Dispose of them at designated waste facilities that accept such materials, ensuring compliance with local regulations.
Never mix contaminated items with regular waste, as this can pose health risks. Additionally, consider documenting the disposal process for your records.
Safety Precautions Required
Ensuring your safety during the disposal of contaminated materials is essential, especially when dealing with mold-infested items.
Follow these precautions to protect yourself:
Wear Personal Protective Equipment (PPE): Use gloves, masks, and goggles to shield yourself from mold spores and other contaminants.
Implement Ventilation Strategies: Open windows and use fans to maintain airflow, reducing the concentration of airborne mold during disposal.
Seal Contaminated Materials: Place moldy items in plastic bags, sealing them tightly before disposal to prevent spore spread.
How to Confirm Mold Is Completely Gone?
How can you be sure that mold has been completely eradicated from your space? Start with thorough mold testing. This involves collecting samples from surfaces and the air to identify any remaining spores.
After remediation, it’s vital to retest the affected areas to confirm that no mold is present. Additionally, monitoring air quality is essential; elevated levels of mold spores can indicate ongoing issues.
Use an air quality monitor specifically designed for mold detection. Conduct these tests at various intervals, especially after heavy rainfall or humidity spikes.
If results show no mold presence and air quality remains stable, you can confidently conclude that the mold has been effectively removed from your environment.
Mold Remediation: Tips for Preventing Future Growth
While you may have successfully remediated mold after water damage, taking proactive steps to prevent future growth is crucial.
Implementing effective mold prevention tips can secure your space long-term. Here are three critical strategies:
Control Humidity: Maintain indoor humidity levels between 30-60% using dehumidifiers and proper ventilation.
Regular Inspections: Routinely check for leaks and water damage in areas like basements, attics, and bathrooms to catch issues early.
Proper Insulation: Ensure pipes and exterior walls are adequately insulated to prevent condensation and reduce moisture buildup.
Frequently Asked Questions
How Long Does the Mold Remediation Process Typically Take?
Mold remediation typically takes 1 to 5 days, depending on mold growth and the affected area’s size. Your remediation timeline can vary based on moisture levels, materials involved, and the remediation team’s efficiency.
What Are the Costs Associated With Mold Remediation Services?
Mold removal costs typically range from $500 to $3,000, depending on the severity and area affected. Professional services ensure thorough assessment and effective treatment, minimizing future risks and providing peace of mind for you and your family.
Can I Perform Mold Remediation Myself?
You can perform mold remediation yourself using DIY techniques, but ensure you take safety precautions. Wear protective gear, isolate the affected area, and properly dispose of contaminated materials to prevent further spread and health risks.
Will My Insurance Cover Mold Remediation Expenses?
Your insurance might cover mold remediation, but it depends on your specific insurance policies and coverage limits. Always review your policy details and consult your agent to verify you’re fully informed about what’s included.
What Types of Mold Are Most Commonly Found After Water Damage?
You’ll commonly find black mold and toxic mold after water damage. These molds thrive in damp environments, often appearing as dark spots. Identifying them early is essential to prevent health risks and further property damage.
Review
Tackling mold remediation after water damage requires diligence, precision, and thoroughness. You must identify the source of moisture, contain the affected areas, and remove any contaminated materials. You need to clean and disinfect surfaces effectively, monitor air quality, and confirm that mold is entirely eliminated. By following these steps and implementing preventive measures, you’ll restore your environment, protect your health, and ensure lasting protection against mold growth.