After experiencing water damage, it’s vital to follow a systematic mold remediation process. Mold thrives in damp environments and can pose serious health risks if left unchecked. By understanding the steps involved, from identifying mold growth to preventing its return, you can safeguard your home and health. But what exactly does this process entail, and how can you ensure it’s done effectively? Let’s explore the essential steps you need to take.
Key Takeaways
- Following the mold remediation process prevents rapid mold growth, which can occur within 24 to 48 hours after water damage.
- Proper remediation protects your health by reducing exposure to harmful mold spores and allergens, especially for sensitive individuals.
- The process helps identify and eliminate moisture sources, preventing future mold infestations and structural damage.
- Effective remediation ensures thorough cleaning, reducing musty odors and visible mold, creating a healthier living environment.
- Engaging professionals for mold remediation provides expertise, ensuring complete eradication and peace of mind for homeowners.
Why You Need to Remediate Mold After Water Damage
When water damage occurs, it’s essential to address mold remediation promptly, as mold can begin to grow within 24 to 48 hours in damp environments.
You need to understand that mold thrives in specific growth conditions, including high humidity and moisture.
By implementing effective mold prevention strategies, you can mitigate the risks associated with water damage. This includes ensuring proper ventilation, repairing leaks, and using dehumidifiers in affected areas.
Neglecting mold remediation can lead to serious health issues and structural damage to your home, which can compromise your sense of safety and belonging.
Taking swift action protects your living space and fosters a healthy environment for you and your loved ones.
Don’t wait—act now to safeguard your home.
Identifying Signs of Mold Growth in Your Home
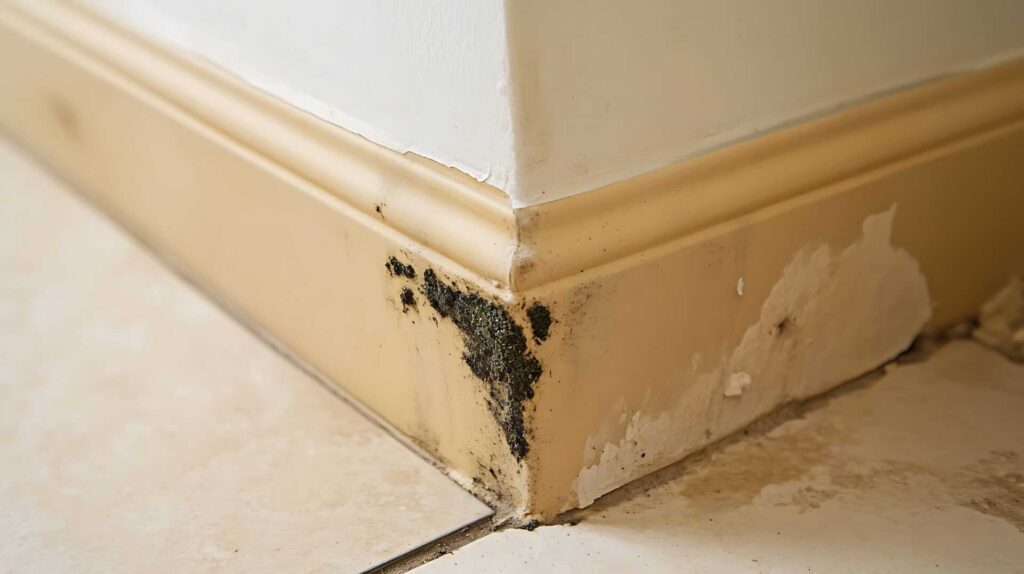
To effectively identify signs of mold growth in your home, look for visible mold patches on surfaces and check for any musty odors.
Mold often appears as black, green, or white spots and can thrive in damp areas.
Detecting these indicators early can help you address the issue before it escalates.
Visible Mold Growth
Visible mold growth can pose serious health risks and structural damage to your home. Recognizing the signs early is essential in preventing further issues.
Here are four common indicators:
Color Variations: Different mold types can appear green, black, or white. Each color may indicate a specific type of mold.
Surface Texture: Mold often presents as fuzzy or slimy patches, indicating active growth.
Location: Check damp areas like bathrooms, basements, and around leaks where mold thrives.
Mold Lifecycle: If you notice mold spores or clusters, it’s important to act quickly, as they can rapidly reproduce and spread.
Musty Odor Detection
A musty odor often signals the presence of mold in your home, even if you can’t see it. Identifying musty odor sources is essential for effective remediation.
Common culprits include damp basements, hidden leaks, or poorly ventilated areas. When detecting moisture, check around windows, plumbing fixtures, and under sinks—these spots often harbor excess water, creating an ideal environment for mold growth.
Pay attention to the smell and to other signs, like peeling paint or water stains. If you notice a persistent musty odor, it’s imperative to act quickly.
Addressing the moisture issue promptly can help prevent further mold development and protect your home’s indoor air quality, ensuring a healthier living space for you and your family.
How to Handle Mold Once You Find It?
Once you’ve discovered mold, it’s vital to act swiftly to prevent further growth and potential health risks.
You can tackle the issue effectively by following these steps:
Identify the Source: Locate the moisture source causing the mold growth for effective mold growth prevention.
Seal Off the Area: Use plastic sheeting to contain the mold, preventing spores from spreading throughout your home.
Use DIY Mold Solutions: Apply a mixture of water and vinegar, or baking soda, to clean the affected area, making sure you wear protective gear.
Dry the Area: Make certain the space is thoroughly dried to eliminate moisture, as this is essential for preventing future mold issues.
Step-by-Step Mold Remediation Process
When you’re faced with mold after water damage, following a systematic mold remediation process is essential to ensure effective removal and prevent future growth.
Start by evaluating the extent of mold growth and identifying moisture sources. Next, make sure you wear protective gear before containing the affected area using plastic sheeting.
Use appropriate remediation techniques, like HEPA vacuuming or damp wiping with a mold-killing solution, to clean surfaces. After cleaning, discard any contaminated materials that can’t be salvaged.
Dehumidify the space to eliminate residual moisture, and make certain proper ventilation to inhibit future mold growth.
Finally, monitor the area regularly to catch any reemergence early. Consistency in these steps will help maintain a healthy environment.
How to Safely Contain Mold During Remediation
Effective mold remediation requires careful containment to prevent spores from spreading to unaffected areas. You can implement several mold containment techniques to create effective barriers during the process:
Seal off the affected area: Use plastic sheeting to cover doorways and vents, ensuring no spores escape.
Create negative air pressure: Use fans and HEPA filters to maintain airflow that draws air into the containment area, preventing spores from escaping.
Wear protective gear: Equip yourself with masks, gloves, and goggles to safeguard against exposure during remediation.
Limit foot traffic: Restrict access to the affected zone, minimizing the risk of spreading mold spores to other parts of your home.
Essential Tools for Effective Mold Removal
To effectively remove mold, you need the right tools and protective gear.
Essential items include respirators, gloves, and specialized cleaning equipment to ensure safety and thoroughness.
Having these tools at hand will streamline the remediation process and minimize health risks.
Protective Gear Necessities
Since mold exposure can pose serious health risks, having the right protective gear is vital during the mold remediation process. You want to ensure your safety and the safety of those around you.
Here are four significant items you should have:
Protective Clothing: Wear long-sleeved shirts and pants to minimize skin exposure.
Safety Goggles: These protect your eyes from mold spores and irritants.
N95 Respirator: This mask filters out harmful particles, assuring you breathe safely.
Gloves: Use rubber or nitrile gloves to prevent direct contact with mold.
Equipping yourself with these essentials safeguards your health and fosters a sense of belonging in your community as you contribute to a safer environment for everyone.
Cleaning Equipment Essentials
Gathering the right cleaning equipment is essential for successful mold removal. Start with high-quality cleaning supplies, including disinfectants and scrub brushes.
You’ll need a bucket, spray bottles, and microfiber cloths to effectively tackle mold surfaces. Make sure to include sanitizing agents like hydrogen peroxide or vinegar, which are effective in killing mold spores.
A vacuum with a HEPA filter is vital for capturing airborne particles, while a moisture meter helps monitor humidity levels, preventing future growth.
Don’t forget disposable gloves and masks to protect yourself during the process. By equipping yourself with these tools, you’ll enhance your ability to restore a safe, mold-free environment, ensuring you belong to a healthy living space.
How Professional Mold Remediation Services Can Help
While tackling mold growth after water damage may seem straightforward, professional mold remediation services provide essential expertise and resources that greatly enhance the effectiveness of the cleanup process.
They offer:
Accurate Mold Detection: Experts use advanced tools to detect hidden mold, ensuring comprehensive coverage.
Effective Remediation Techniques: Trained professionals implement specialized methods tailored to your specific situation, minimizing risks.
Safety Protocols: They follow stringent safety measures to protect your health and the environment during the remediation process.
Post-Remediation Assessment: Professionals conduct thorough evaluations to ensure the mold is fully eradicated and prevent future issues.
Engaging with these services safeguards your living environment and gives you peace of mind, knowing you’re backed by industry knowledge and experience.
How to Prevent Mold After Remediation
After professional mold remediation, it’s essential to implement preventive measures to make sure mold doesn’t return.
Start by maintaining ideal humidity levels in your home, ideally between 30% and 60%. Use dehumidifiers in damp areas like basements and bathrooms to control moisture effectively.
Regularly inspect for leaks in pipes, roofs, and windows, and address any water intrusion immediately. Ensure proper ventilation in areas prone to humidity, such as kitchens and laundry rooms.
Additionally, clean and dry any water spills promptly. You should also consider using mold-resistant products when renovating or repairing your home.
Top Mistakes Homeowners Make When Remediating Mold
What common pitfalls do homeowners face when addressing mold issues?
Many plunge into remediation without fully understanding the process, leading to mistakes.
Here are four common missteps:
Ignoring the source: Not addressing the water issue allows mold to return.
Underestimating the severity: Believing small patches can be handled DIY often leads to larger infestations.
Skipping personal protection: Failing to wear appropriate gear can expose you to harmful spores.
Misconceptions about removal: Using bleach is a common misconception; it doesn’t eliminate mold roots.
These DIY challenges can complicate the remediation process, making it crucial to approach mold issues with education and caution.
Don’t let these mistakes undermine your efforts toward a safer home.
Health Risks of Mold Exposure and When to Seek Help?
Mold exposure can pose serious health risks, particularly for individuals with respiratory conditions, allergies, or weakened immune systems. You might experience mold symptoms such as coughing, sneezing, skin irritation, or even more severe respiratory issues.
If you notice these symptoms, it’s important to assess your environment for mold and seek help. Following health guidelines is significant; don’t hesitate to consult a healthcare professional if symptoms persist or worsen. Remember, early intervention can prevent more significant health complications.
If you suspect mold growth in your home, addressing it promptly is essential for your well-being and that of your loved ones. Prioritizing a safe living space protects your health and creates a sense of security and belonging for everyone in your home.
Frequently Asked Questions
How Long Does the Mold Remediation Process Typically Take?
The mold remediation process typically takes 1 to 5 days, depending on mold growth factors and chosen remediation techniques. You’ll want to address the source of moisture to prevent future issues effectively.
Can I Stay in My Home During Mold Remediation?
You shouldn’t stay in your home during mold remediation. Picture toxic spores swirling like invisible dust; avoiding exposure is essential for staying safe. Prioritize your health over comfort until the professionals declare your space clear.
What Are the Costs Associated With Mold Remediation?
Mold inspection costs typically range from $200 to $600, while remediation methods can vary considerably, averaging between $1,500 and $3,000. Your specific costs depend on the extent of the mold and necessary treatments.
Will My Homeowner’s Insurance Cover Mold Remediation?
Your homeowner’s insurance might cover mold remediation, but it depends on your policy limits and specific coverage details. Review your policy to understand what’s included and consult with your insurer for clarification on mold-related claims.
How Can I Tell if Mold Is Completely Removed?
To ensure mold is completely removed, use mold inspection techniques and conduct post-remediation testing. These methods confirm that no spores remain, providing peace of mind that your environment is safe and healthy for you and your family.
Wrap-Up
Following the mold remediation process after water damage is essential for your health and your home. By identifying signs of growth, handling mold properly, and employing effective containment strategies, you safeguard your living space. Additionally, preventing future mold and learning from common mistakes ensures a lasting solution. Remember, your well-being and your property’s integrity depend on thorough remediation. Don’t overlook the importance of a proactive approach in maintaining a safe, mold-free environment.