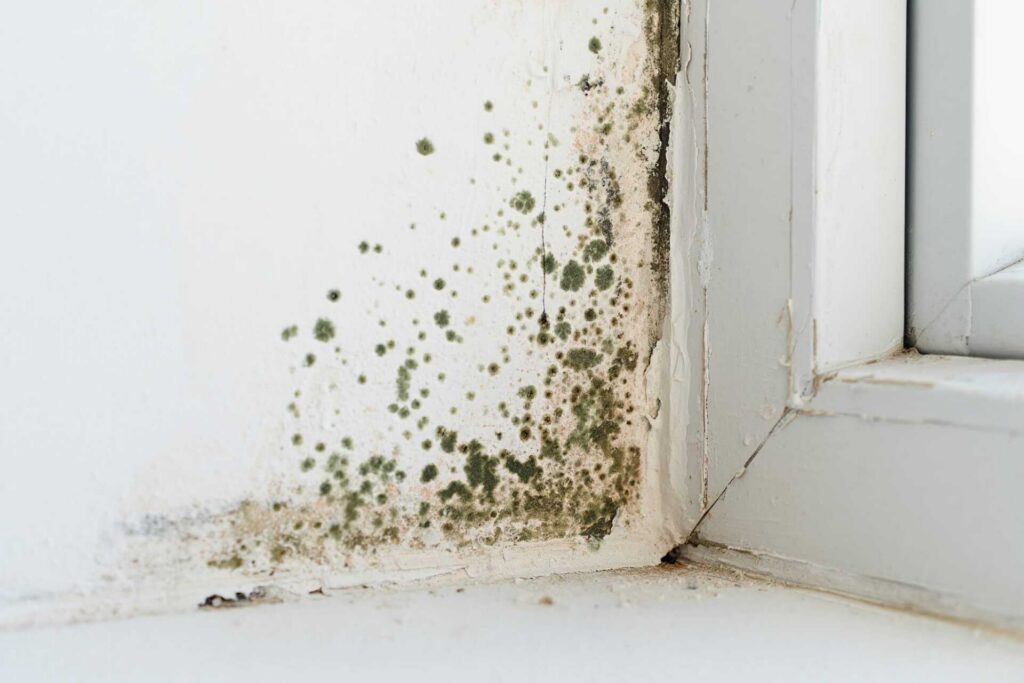
Identifying the source of water damage, protecting yourself effectively, and containing the affected area are critical steps in black mold remediation. Each step is essential to ensure safety and prevent further growth. By following a systematic approach, you can tackle the issue efficiently. However, knowing the process isn’t enough; understanding how to implement these steps is key to successful mold removal and prevention. Let’s explore the important actions you need to take.
Key Takeaways
- Inspect the affected area for visible mold, water damage, and potential sources of moisture to assess the extent of the problem.
- Wear protective gear, including an N95 respirator, gloves, and goggles, to safeguard against mold exposure during the remediation process.
- Contain the affected area by sealing off doors, windows, and vents to prevent mold spores from spreading to other parts of the property.
- Remove and properly dispose of wet materials, thoroughly dry the area, and disinfect surfaces to eliminate mold spores and prevent regrowth.
- Implement moisture control strategies, such as using dehumidifiers and improving ventilation, to maintain low humidity levels and reduce future mold risks.
How to Identify and Assess the Water Damage Source
How can you pinpoint the source of water damage? Start by inspecting common water sources like pipes, roofs, or appliances.
Look for visible leaks, water stains, or mold growth, as these often indicate a problem. During your damage assessment, check both the interior and exterior of your property.
Pay attention to areas around windows, doors, and basements where moisture accumulation is frequent. Use a moisture meter for precise readings, especially in hidden spaces.
If you notice unusual odors, it could signal hidden water damage. Document your findings thoroughly; this will help with remediation efforts.
Identifying the source early aids effective remediation, helps prevent further damage, and keeps your living space safe and welcoming.
Protect Yourself: Gear Up for Safe Mold Remediation
Before starting mold remediation, it’s vital to equip yourself with the right protective equipment to ensure your safety.
Following safety protocols is important to minimize health risks when dealing with black mold.
Here’s a list of protective gear you should wear:
N95 Respirator Mask: This filters airborne particles, protecting your lungs from mold spores.
Goggles: Wear safety goggles to shield your eyes from irritants and spores.
Gloves: Use rubber or latex gloves to protect your skin from mold and cleaning solutions.
Protective Clothing: Long sleeves and pants can help prevent skin contact with mold.
Contain the Affected Area to Prevent Mold Spread
To effectively contain the affected area, you need to seal it off from the rest of your home.
Use plastic sheeting to create a barrier that prevents mold spores from spreading.
Additionally, establish airflow control to minimize cross-contamination during the remediation process.
Seal Off Affected Area
Sealing off the affected area is essential to prevent mold spores from spreading throughout your home.
Implementing effective sealing techniques can notably reduce the risk of mold growth and protect your living space. Here’s how to do it:
Identify the affected area – Locate all areas with visible mold or water damage.
Close doors and windows – Make sure all openings are shut to limit airflow.
Seal vents – Cover air vents with plastic or tape to prevent spores from circulating.
Use air purifiers – Employ HEPA air purifiers to capture airborne mold spores while you work.
Use Plastic Sheeting
Using plastic sheeting is an essential step in containing the affected area during mold remediation, as it effectively prevents spores from spreading to other parts of your home.
By sealing off the contaminated zone, you minimize the risk of different mold types infiltrating unaffected areas, ensuring a more efficient cleanup process.
Start by measuring the affected space and cutting the plastic sheeting accordingly. Use duct tape to secure the edges, creating a barrier that’s both air-tight and durable.
This method is important to employ alongside other remediation techniques, as it keeps spores contained, reducing cross-contamination.
Establish Airflow Control
While you focus on effective mold remediation, establishing airflow control is essential for containing the affected area and preventing mold spores from spreading.
Implementing the right airflow methods and ventilation techniques ensures that you create a controlled environment for remediation. Here are four steps to take into account:
Seal Off the Area: Use plastic sheeting to contain the mold-affected zone.
Utilize Fans: Position fans to direct airflow towards open windows or doors to expel spores.
Install Air Purifiers: Use HEPA-filtered air purifiers to capture airborne mold spores effectively.
Monitor Humidity: Keep humidity levels below 60% using dehumidifiers, preventing further mold growth.
Removing Moisture: How to Dry Out the Space
To effectively remove moisture and dry out the space, you’ll need to use dehumidifiers strategically to lower humidity levels.
Additionally, improving air circulation will help accelerate the drying process and prevent mold from returning.
Together, these methods create an environment that discourages mold growth.
Use Dehumidifiers Effectively
Dehumidifiers are vital tools in the remediation process, effectively reducing moisture levels to prevent mold growth.
To use them effectively for humidity control, consider the following tips:
Optimal Dehumidifier Placement: Position your dehumidifier in the center of the affected area for maximum efficiency.
Seal Off Areas: Close doors and windows to prevent outside humidity from interfering with your efforts.
Monitor Humidity Levels: Use a hygrometer to verify humidity stays below 60%, which is essential for mold prevention.
Run Continuously: Keep the dehumidifier running 24/7 until the space is completely dry to eliminate any residual moisture.
Improve Air Circulation
How can you effectively improve air circulation to expedite the drying process? Start by implementing various airflow techniques.
Open windows and doors to create cross-ventilation, allowing fresh air to flow in while pushing damp air out. Use fans strategically to enhance this airflow, positioning them to direct air towards wet areas.
If you have ventilation systems, verify they’re operational; they can greatly aid in reducing humidity levels. Consider using exhaust fans in bathrooms or kitchens, as these can help eliminate moisture buildup.
By maximizing air circulation, you’ll foster an environment conducive to drying, which is essential in preventing black mold growth.
Cleaning and Disinfecting Surfaces in Mold Remediation
When addressing mold issues, cleaning and disinfecting surfaces are essential to prevent further growth and ensure a safe environment.
Here are some effective mold cleaning techniques to evaluate:
Identify Affected Areas: Inspect all surfaces for visible mold growth and water damage.
Prepare Cleaning Solutions: Use a mixture of water and a mild detergent or a dedicated mold cleaner for disinfecting surfaces.
Scrub Thoroughly: Apply the cleaning solution with a scrub brush or cloth, ensuring you reach all mold-infested areas.
Rinse and Dry: After cleaning, rinse the surfaces with clean water and dry them completely to inhibit mold regrowth.
Best Practices for Safe Disposal of Contaminated Materials
When dealing with contaminated materials, it’s essential to follow best practices for safe disposal to prevent further mold exposure.
First, identify items such as drywall, carpet, or insulation that are beyond cleaning and must be treated as hazardous waste. Seal these materials in heavy-duty plastic bags or containers to minimize the risk of spores spreading during transport.
Next, check local regulations for approved disposal methods, as improper disposal can lead to fines or health risks. Consider hiring certified professionals for large-scale removals, ensuring compliance with safety standards.
Always wear protective gear while handling contaminated materials, and dispose of them promptly to maintain a safe environment for you and your community.
Strategies for Preventing Future Mold Growth
After safely disposing of contaminated materials, the next step is implementing strategies to prevent future mold growth.
By taking proactive measures, you can protect your space and promote a healthier environment.
Consider these strategies:
Use mold-resistant materials: When renovating or building, opt for mold-resistant drywall and paints to minimize the risk.
Control humidity levels: Keep indoor humidity below 60% using dehumidifiers and proper ventilation.
Perform regular inspections: Check for leaks and water damage frequently to catch issues early.
Clean and maintain HVAC systems: Regularly service your heating and cooling systems to prevent moisture buildup and mold growth.
Frequently Asked Questions
How Long Does It Take for Mold to Grow After Water Damage?
Mold can start growing within 24 to 48 hours after water damage, depending on factors like humidity, temperature, and surface materials. Understanding this mold growth timeline helps you act quickly to prevent further damage.
Can I Remove Black Mold Myself or Should I Hire a Professional?
You can attempt DIY mold removal, but hiring professional services is often safer and more effective. Professionals ensure thorough remediation, preventing future growth and protecting your health, while DIY may overlook hidden mold sources.
What Types of Mold Are Most Common After Water Damage?
After water damage, you’ll often encounter mold types like Aspergillus, Penicillium, and Stachybotrys. Accurate mold identification is vital, as each type poses different health risks and requires specific remediation approaches to ensure your safety.
Will Insurance Cover the Cost of Mold Remediation?
Think of insurance as a protective shield. It might cover mold remediation, but you’ll need to check your policy’s mold coverage and understand the insurance limits to ensure you’re fully protected against unexpected costs.
Are There Any Health Risks Associated With Black Mold Exposure?
Yes, black mold exposure can lead to various health symptoms, especially if you have mold allergies. You might experience respiratory issues, skin irritation, or other allergic reactions, making it essential to address mold problems promptly.
Summary
By following these seven steps for black mold remediation, you can effectively tackle mold issues and protect your home. For instance, imagine a family that faced severe mold growth after a pipe burst. By containing the area, drying the space, and thoroughly cleaning surfaces, they removed the mold and prevented its return. Implementing preventive measures, such as monitoring humidity, ensured their home remained safe and healthy moving forward. Take these steps to safeguard your living environment.