
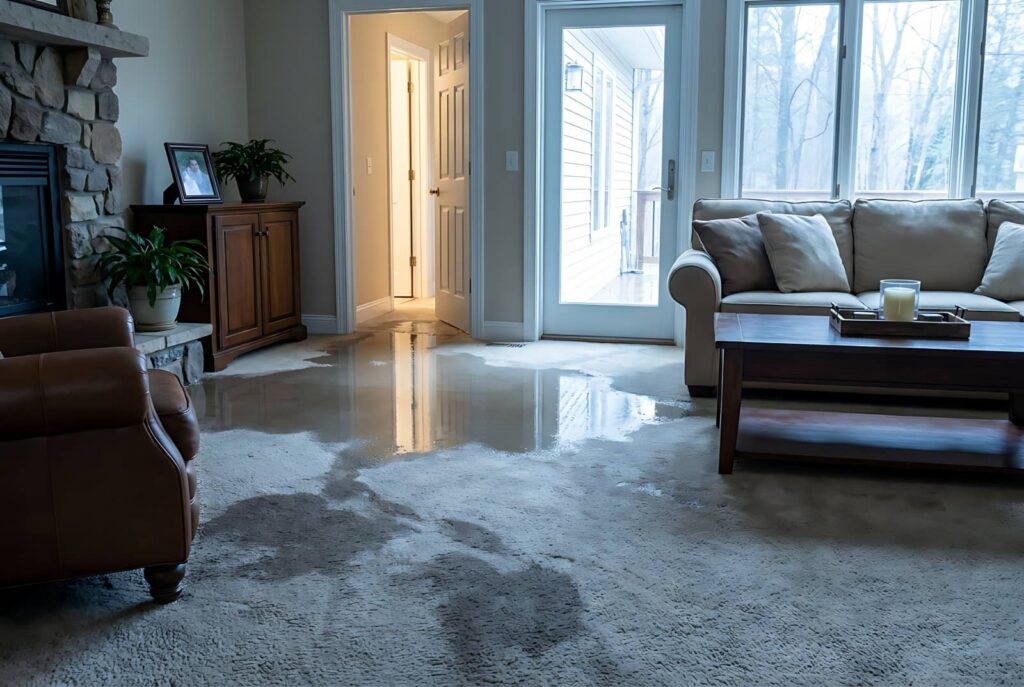
Most people don’t realize that flood damage starts spreading within hours, not days. Flood Damage Extraction begins with stopping the water safely, extracting standing water fast, and controlling humidity before materials wick moisture deeper into walls and floors. Then you can inspect for mold, remove contaminated items, and begin targeted repairs without trapping damage inside the structure. The right sequence can save time, limit costs, and determine whether you can handle the job yourself.
Key Takeaways
- Shut off water and electricity, then wear protective gear before entering flooded areas.
- Remove standing water quickly with pumps and wet vacs, checking under furniture and appliances.
- Dry affected spaces with dehumidifiers, ventilation, and moisture monitoring to prevent mold.
- Remove swollen, contaminated materials and inspect drywall, insulation, subfloors, and framing for hidden damage.
- Contact flood restoration professionals for hidden moisture, structural concerns, and insurance documentation.
Stop the Water Safely
Before you do anything else, shut off the water source at the main valve if you can reach it safely.
Then check other water sources, including supply lines, appliances, and exterior connections, and close each one you can isolate.
If the valve won’t move, don’t force it; you could worsen the break or injure yourself.
Put on rubber boots, gloves, and eye protection before entering wet areas.
Keep electricity off near standing water and stay clear of damaged ceilings or loose fixtures.
If you smell gas or see structural instability, leave and call emergency services.
These safety precautions help you stay in control while you protect your home and your crew.
Once the flow stops, you’re ready for the next repair step.
Extract Water Fast Before Damage Spreads
You need to remove standing water immediately with pumps, wet vacs, or extraction equipment to limit structural and material loss.
Act fast, because moisture moves into drywall, insulation, flooring, and framing within hours and spreads damage beyond the visible flood zone.
Keep extracting until surfaces are no longer saturated, then start drying and dehumidifying to stop further migration.
Rapid Water Removal
Water starts worsening damage within minutes, so extract it immediately with a pump, wet/dry vacuum, or professional extraction equipment. You’ll protect floors, wall cavities, and contents by acting in a disciplined emergency response.
Use water removal techniques that match the volume: pump standing water first, then vacuum residual pools from edges, corners, and low spots. Work room by room so you stay organized and keep your team aligned.
Empty equipment frequently to maintain suction and speed. Remove loose debris only if it doesn’t block access. Check under furniture, rugs, and appliances, because hidden water can keep feeding damage.
When you move quickly and methodically, you give your space the best chance to recover cleanly and keep your household on track.
Moisture Spread Prevention
Even after visible pooling is gone, moisture can continue traveling through carpet, padding, drywall, trim, and subfloors, so you need to stop migration fast.
Pull baseboards, lift wet carpet, and create airflow across exposed edges. Place moisture barriers under clean, dry materials to isolate them from damp slabs or framing.
Keep humidity control active with dehumidifiers and exhaust fans until readings stabilize. Check concealed cavities with a meter, because trapped water often moves into adjacent rooms and shared walls.
You’re not managing this alone; a disciplined dry-out protects your space and helps your crew stay ahead of secondary damage.
- Seal wet zones to block capillary spread.
- Map moisture daily and remove saturated materials.
- Maintain low RH until contents and structure equalize.
Dry Flood-Damaged Walls and Floors
Start drying walls and floors as soon as you finish removing standing water and unsalvageable materials.
Use flood restoration techniques that move air across wet surfaces, and set dehumidifiers in the affected rooms to pull moisture from framing, subfloors, and finishes.
Open baseboards or drill small access points near the floor so hidden wall cavities can breathe; these wall drying methods help you dry faster without trapping dampness.
Lift carpets, pad, and underlayment if they’re saturated, then clean hard flooring with a wet vac and towels.
Keep temperature steady, replace filters, and check moisture readings daily until materials return to normal levels.
You’re doing the right work here, and careful drying protects your home and helps your crew move forward together.
Check for Mold After Flood Damage
Once surfaces are dry, inspect every affected area for mold growth, musty odors, and hidden damp spots, especially behind baseboards, inside wall cavities, under flooring, and around insulation. Use a bright flashlight and note any staining, fuzzy patches, or discoloration.
If you find recurring moisture, improve ventilation, repair leaks, and keep indoor humidity below 60% for mold prevention.
- Track suspect areas so you can compare changes over time.
- Document odors and visible growth to support accurate follow-up.
- Watch for health risks, especially if anyone has asthma or allergies.
You don’t need to panic, but you do need to stay consistent. Check corners, trim, and seams carefully, and repeat inspections over the next few days.
Early detection helps you protect your space, reduce health risks, and keep your home feeling safe, familiar, and under control.
Remove Contaminated Materials Safely
Tear out any materials that are visibly contaminated, swollen, delaminated, or still holding moisture, because damaged drywall, insulation, carpet padding, ceiling tiles, and particleboard can harbor mold and bacteria.
Wear gloves, eye protection, a respirator, and boots before you start. Use contaminated material identification to separate salvageable items from waste, and bag debris as you remove it to limit spread.
Cut drywall at least 12 inches above the highest water line when the cavity’s wet, then seal bags or wrap larger pieces in plastic.
Follow safe disposal methods required by your local landfill or waste authority, and keep the work zone isolated until you finish.
You’re not alone in this step; careful removal protects your crew, your home, and the next phase of cleanup.
Repair Flood Damage in Walls and Trim
After you’ve removed damaged materials, inspect the wall cavities and trim for lingering moisture, warped framing, cracked plaster, and loosened fasteners before you rebuild.
You should measure moisture, then dry the assembly fully so hidden decay doesn’t return. Replace any compromised wall insulation with dry, correctly sized batts or boards, and secure them without compressing their R-value.
Refasten framing, patch minor plaster loss, and apply corrosion-resistant nails or screws where old trim failed. For trim replacement, match profile, thickness, and expansion gaps so joints stay tight and look intentional.
Keep your repairs consistent, and you’ll help the room feel whole again.
- Check every stud bay before closing it.
- Fit materials so the repair stays stable.
- Finish edges cleanly to restore trust.
Clean Up Burst Pipe and Storm Water Damage
Start by shutting off the water source, then remove standing water, wet debris, and saturated materials from the burst pipe or storm entry area as quickly as possible.
You’ll protect nearby finishes and reduce structural spread when you work methodically. Use a wet vac, buckets, and absorbent pads to clear the area, then open access panels and baseboards for pipe inspection.
Check joints, valves, and visible framing for active leaks or impact damage. If storm water entered, sort contaminated contents from salvageable items and bag waste right away.
Clean hard surfaces with detergent, rinse, and dry them. Document all damage for your contractor and insurer.
As a team, you can stay organized, move fast, and support storm preparedness by sealing obvious entry points after cleanup.
Finish Repairs and Prevent Future Mold
Once the wet materials are removed and the area is clean, you can begin the repair phase by replacing damaged drywall, insulation, trim, and any compromised framing or subflooring.
Choose materials rated for wet areas when possible, and seal joints so humidity can’t linger behind finishes. Keep your repair crew aligned on moisture control by measuring surfaces before you close walls or install flooring.
For mold prevention, verify that the area stays dry during and after repairs.
- Install vapor barriers only where your assembly design calls for them.
- Run fans and dehumidifiers until readings stabilize.
- Caulk gaps around penetrations to limit hidden dampness.
When you finish, inspect seams, corners, and baseboards for staining or soft spots.
That final check helps your space stay safe, solid, and ready for normal use.
Know When to Call Flood Experts
If the damage extends beyond surface materials, you should call flood restoration experts to assess structural, electrical, or hidden moisture issues.
You need professional help when drywall swells, insulation stays wet, or subfloors soften after drying. Experts use meters, thermal imaging, and controlled extraction to find moisture you can’t see.
They’ll also document losses for flood insurance claims and help you prioritize safe repairs. If you smell mildew, notice warped framing, or lose power in affected rooms, stop DIY work and contact licensed technicians.
Keep your emergency contacts list updated so you can reach plumbers, electricians, and insurers quickly. Acting early protects your home, your team, and your peace of mind when recovery feels overwhelming.
Frequently Asked Questions
What Insurance Documents Should I Gather Before Cleanup?
Gather your insurance policy, declarations page, agent contact, photos, videos, receipts, prior appraisals, and emergency expenses before cleanup. These documents speed the claim process, prove losses, and help you feel supported throughout recovery.
How Do I Estimate Hidden Structural Damage Costs?
You’ll estimate hidden damage by opening walls, checking framing, insulation, and subfloors, then comparing moisture readings and repair quotes. For accurate cost assessment, add labor, materials, permits, and a 15-25% contingency.
Can Flood Damage Affect Electrical Wiring Behind Walls?
Yes, floodwater can damage wiring behind walls. You should prioritize electrical safety, schedule a wiring inspection, perform moisture assessment, and follow restoration tips. When you act quickly, you protect your home and belong with prepared, informed owners.
What Temporary Housing Options Exist During Major Repairs?
You can use temporary accommodations like hotels, short-term rentals, or extended-stay suites while repairs continue. You should check rental assistance through insurance, FEMA, or local aid programs to offset costs and keep your household stable.
How Soon Should I File a Flood Insurance Claim?
File your flood insurance claim immediately, like starting extraction before mold spreads. You’ll protect evidence, meet insurance timelines, and speed payment. Contact your insurer within days, document damage, and keep every receipt.
Summary
Flood damage can snowball fast, so act like every minute counts. Shut off the source, extract water, dry materials thoroughly, and remove anything contaminated before mold takes hold. Check walls, floors, and trim carefully, then repair only when surfaces are fully dry and stable. If damage is widespread or unsafe, call flood experts. With quick, disciplined steps, you can stop a small mess from becoming a house-sized headache.