
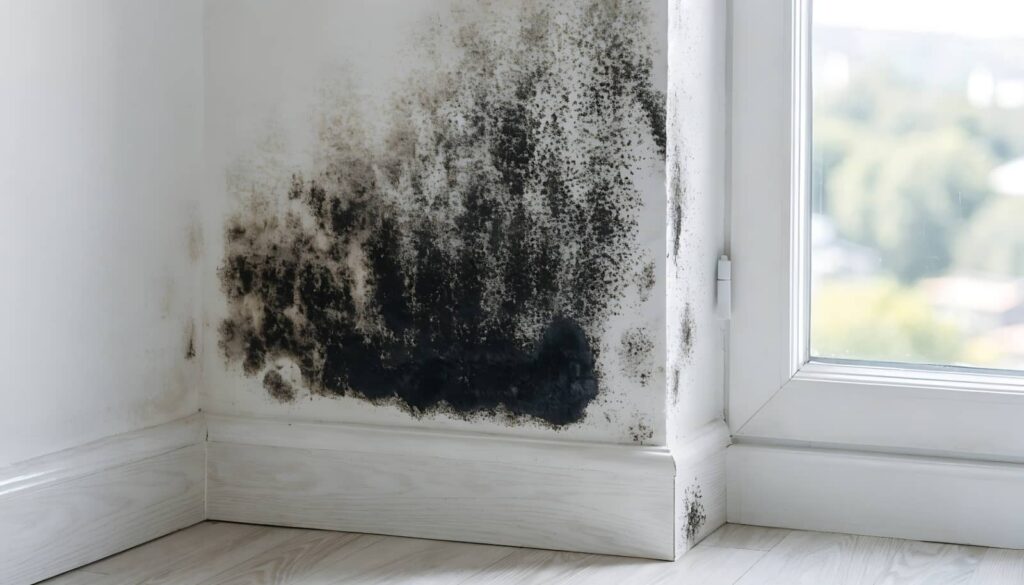
After water damage, you need to test before you rebuild. Start by checking for electrical and structural hazards, then measure moisture in walls, floors, and trim with a meter. Next, look for mold, odors, and damp hidden spaces, including vents and cavities. You’ll also need to decide which testing method fits the situation and which materials can’t be saved. The next step can change everything.
Key Takeaways
- Check for safety hazards first, including sagging ceilings, exposed wiring, gas smells, and contaminated water before entering.
- Use moisture meters and wall probes to find hidden dampness in walls, floors, baseboards, and other soft materials.
- Look for visible mold, musty odors, and hidden growth behind trim, under flooring, and inside cabinets or HVAC areas.
- Test air quality after drying to confirm humidity and spore levels are back to safe ranges.
- Photograph and document all damage, then schedule a mold inspection within 24 to 48 hours.
Check Safety Before Entering
Before you step inside after water damage, make sure the area is safe to enter. You should pause at the threshold and look for visible hazards, including sagging ceilings, cracked framing, exposed wiring, gas odors, and contaminated standing water.
Wear safety equipment such as boots, gloves, a mask, and eye protection before you move farther in. If you smell fuel, hear hissing, or see sparks, stop and follow emergency procedures right away.
Shut off utilities only if you can do so without risk, and wait for trained responders when conditions look unstable. You belong in a space that’s been checked carefully, so trust your judgment, keep others out, and document any dangers for the professionals who follow.
Test Walls and Floors for Moisture
Once the area is safe, test the walls and floors for hidden moisture so you can gauge the extent of the damage. You’ll want to move methodically through each room, checking the lowest sections first because water often settles there.
Use moisture meters on drywall, baseboards, and flooring to spot elevated readings. For deeper checks, insert wall probes into suspect areas, especially near seams, trim, and any softened material.
Compare measurements from damaged sections with dry areas so you can identify abnormal levels. Mark each reading on a simple floor plan, and keep your notes organized.
If readings stay high, continue testing adjacent surfaces until you map the spread. This process helps you work like a prepared team and make confident next steps together.
Look for Mold Growth and Odors
Check for visible mold on drywall, trim, insulation, and any damp surfaces, and note any discoloration or fuzzy growth.
Smell the area for a musty odor, since that often points to active moisture and microbial growth even when you can’t see it.
Inspect hidden zones like behind baseboards, under flooring, inside cabinets, and around HVAC components where mold can spread unnoticed.
Visible Mold Signs
Visible mold signs often appear within a day or two of water damage, especially on drywall, insulation, wood framing, and other porous materials.
You should inspect for discoloration, fuzzy patches, and speckled colonies along seams, corners, baseboards, and behind removed trim. Check for green, black, white, or gray growth, and note any spreading spots or water lines that suggest active moisture.
If you see mold, isolate the area, document it, and plan prompt mold removal to limit further spread. Treat visible growth seriously because it can signal elevated health risks, especially for sensitive people in your home or team.
Use a flashlight and gloves, and test adjacent surfaces if they feel damp or stained.
Musty Odor Checks
A persistent musty smell is often one of the earliest signs of hidden mold after water damage. You should trace the strongest odor zones first, then compare rooms, closets, and HVAC returns to narrow likely musty smell sources.
Use your nose at floor level and near damp materials, since stagnant moisture can trap odor. If the smell intensifies after closing doors or turning on fans, note the pattern and document it.
Then test simple odor removal techniques: dry the area, increase ventilation, replace soaked porous items, and clean nonporous surfaces with an appropriate disinfectant.
If the scent lingers after drying, you’ve likely got active microbial growth. Stay systematic, keep records, and involve your household so everyone checks consistently for changes.
Hidden Growth Areas
Hidden mold often hides where water lingers longest, so you’ll need to inspect the least obvious zones first. Check behind baseboards, under cabinets, inside wall cavities, and around HVAC returns for discoloration, soft materials, or fuzzy growth.
Use a flashlight and your nose; a sour, earthy odor often signals active moisture. If you find damp insulation or warped drywall, document it and isolate the area so your household stays safe and included in the recovery plan.
- Seeing spots can feel alarming, but it gives you a clear next step.
- A persistent odor can shake your confidence, yet it points you to the source.
- Drying hidden spaces supports mold prevention and moisture control.
Keep testing daily until surfaces stay dry and smells fade.
Choose a Mold Testing Method
Once you know where moisture has reached, you can choose a mold testing method that matches the problem and the level of certainty you need.
If you want a quick screen, use visual checks plus moisture readings to confirm active risk. For broader confirmation, compare mold testing techniques such as tape lifts, swabs, and dust sampling, each of which tells you something different about contamination.
If you need to know whether spores are airborne, schedule air quality assessments with a qualified inspector, especially after drying seems complete.
You’ll make better decisions when you pair the test with your goal: verification, documentation, or cleanup planning.
Stay methodical, record results, and keep your findings together so you and your remediation team can move forward with confidence.
Inspect Vents and Hidden Spaces
Start with the vent grilles and check for moisture, staining, rust, or visible mold buildup.
Remove covers as needed and inspect the hidden spaces behind them, including duct edges, wall cavities, and framing near the opening.
If you spot damp debris or odor, document it and test those areas directly.
Vent Grille Checks
Pull off each vent grille and inspect the duct opening, surrounding drywall, and adjacent framing for dampness, staining, rust, or mold. You’re checking one of the easiest places water can hide, and careful vent maintenance keeps your system trustworthy.
Look for warped screws, swollen edges, or a musty odor that signals lingering moisture. Clean each grille with a dry cloth, then verify that air circulation feels even after you reinstall it.
- You protect your home before a small issue grows.
- You keep your space safer for everyone inside.
- You gain confidence from a clear, methodical check.
If a grille feels cool, wet, or discolored, document it and continue monitoring. This simple step helps your crew stay aligned and supports faster recovery.
Hidden Space Inspection
After you’ve checked the visible vent grilles, inspect the hidden spaces behind them, along baseboards, inside wall cavities, and under flooring where water can travel unnoticed.
Use a moisture meter and a flashlight to trace dampness, staining, warped trim, and soft drywall. Feel for cool air leaks, musty odor, or swelling that suggests hidden moisture.
If you can access an attic, crawlspace, or utility chase, document each area before and after drying. This method helps you confirm whether water reached materials that could weaken structural integrity.
Work room by room, stay organized, and trust your observations; you’re not guessing, you’re verifying.
When you find an issue, mark it clearly so your repair team can move with the rest of you toward a safe, dry, healthy space.
Test Air Quality After Drying
Once the structure is dry, test the air to confirm that hidden moisture hasn’t led to mold growth or lingering contaminants. You should assess air quality with calibrated sensors and compare readings in affected rooms against outdoor baselines.
Use testing methods that check humidity, volatile compounds, and particulate levels, then document each result so you can spot patterns, not guess. If numbers stay elevated, repeat sampling at different times of day to verify the trend.
You’re not just checking a building—you’re protecting the people who live and work with you, and that matters.
- Relieved when readings match safe ranges
- Confident when data replaces uncertainty
- Reassured when your space feels like home
Identify Porous Materials to Remove
Next, identify any porous materials that absorbed water and can’t be reliably dried in place, because these items often trap moisture, support mold growth, and continue to release contaminants.
You should inspect drywall, insulation, carpet pad, ceiling tiles, particleboard, paper-backed wallpaper, and upholstered items. If they stayed saturated for long, smell musty, or break apart when handled, plan for removal.
Mark each affected area, then separate salvageable nonporous surfaces from contaminated porous materials.
Use controlled removal techniques: cut drywall above the wet line, lift carpet and pad together, and bag loose debris immediately.
Wear gloves, eye protection, and a respirator when needed.
Keep your workflow organized so you and your team can clear the space efficiently, reduce cross-contamination, and prepare the structure for the next drying step.
Photograph Damage for Insurance Claims
Before you remove or discard anything else, document the damage for your insurance claim. Use your phone or camera to capture wide shots, then close-ups of every affected room, wall, floor, and item. Include timestamps if possible, and keep each image sharp, well lit, and unedited. Photograph standing water, staining, warped materials, and any visible debris from multiple angles so your insurance documentation is complete.
You’ll feel more in control when every loss is recorded.
You belong in the claim process when your evidence is organized.
You can support your adjuster with clear, methodical proof.
Save copies in cloud storage and label folders by room and date. A thorough photo log helps you explain damage clearly, speeds review, and reduces disputes about what happened.
Schedule a Mold Inspection After Water Damage
Arrange a mold inspection within 24 to 48 hours after water damage if any materials stayed wet or you notice a musty odor.
You’ll want a qualified inspector to assess hidden moisture, sample suspect areas, and identify mold types that can signal ongoing contamination.
Ask for moisture readings in walls, floors, and HVAC spaces, because you need a clear map of affected zones before cleanup starts.
If your home has repeated leaks, set a regular inspection frequency so you catch growth early and protect your household.
You’re not handling this alone; a solid inspection gives your team the data needed to plan drying, removal, and repairs with confidence.
Keep records, follow recommendations, and verify that the source of water damage stays fixed.
Frequently Asked Questions
How Long After Drying Should I Retest for Moisture?
Retest immediately after drying stops, then again 24 hours later; you’ll catch rebound moisture. Use moisture detection tools to verify readings, and keep using drying techniques until levels stay stable across two consecutive checks.
Can Hidden Water Damage Affect Electrical Systems?
Yes, hidden water damage can silently corrode your electrical system like rust in a bridge. You should treat it seriously, prioritizing electrical safety and moisture detection, then inspect outlets, wiring, and panels before re-energizing anything.
What Household Items Are Safest to Salvage?
You can usually salvage sealed metal, glass, and intact hardwood items first. Start furniture restoration on dry frames, and prioritize document preservation by freezing wet papers quickly. Avoid porous, moldy, or swollen materials.
How Soon Should Insurance Claims Be Filed?
File your claim immediately, before the trail goes cold. You should notify your insurer within 24 hours, review your insurance policy, and start the claim process fast so you protect coverage and support your recovery.
Do Dehumidifiers Help Prevent Future Mold Growth?
Yes, dehumidifiers help prevent future mold growth by lowering humidity. You’ll improve dehumidifier effectiveness with mold prevention techniques like keeping indoor moisture below 60%, ventilating damp areas, and checking hidden wet materials regularly.
Recap
After water damage, you should test methodically, not guess blindly. Check safety first, then measure moisture in walls and floors, inspect for mold and odors, and verify air quality after drying. Remove porous materials that stay wet, and document everything with photos for insurance and remediation. When you inspect vents and hidden spaces, you catch what the eye can’t see. Careful testing turns uncertainty into control, and control is what protects your home.