
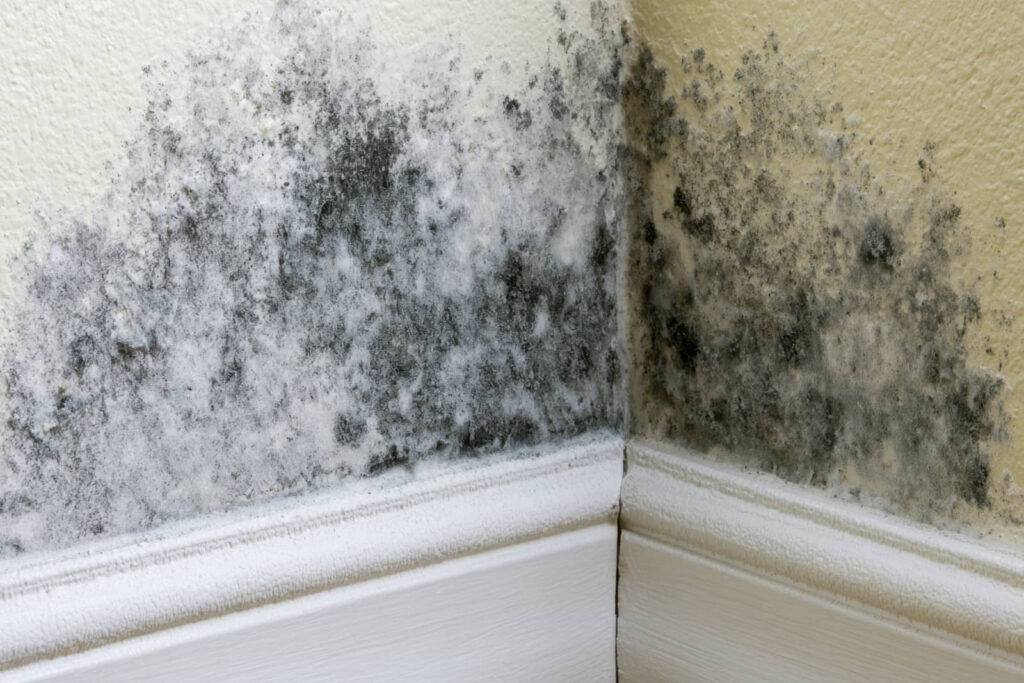
After a pipe burst, you may think drying the visible water is enough, but hidden moisture can stay trapped in drywall, insulation, and subfloors. That’s where mold can start fast, even if surfaces look clean. You need testing to confirm what’s growing, where the damage extends, and whether cleanup is actually complete. The real risk often isn’t obvious at first, and what inspectors find next can change your response.
Key Takeaways
- Mold can start growing within 24 hours after a pipe burst, even if you don’t see it yet.
- Testing finds hidden mold in drywall, insulation, subfloors, and other porous materials.
- Musty odors, discoloration, and dampness can signal mold growth after water damage.
- Air and surface testing confirm contamination and help guide proper cleanup and remediation.
- Early testing protects health, especially for people with asthma or allergies, and prevents further spread.
When to Test for Mold After a Burst Pipe
You should test for mold after a burst pipe as soon as the area has been dried and any visible water has been removed, especially if the leak lasted more than 24 hours or soaked porous materials like drywall, insulation, carpet, or wood.
In your emergency response, don’t wait for stains or odors alone; these signs can lag behind hidden growth. If you’ve cleaned the space but materials still feel damp, schedule testing right away. You’ll protect your home and help your household stay confident and safe.
For strong mold prevention, test sooner when water reached wall cavities, subfloors, or HVAC components. If you see recurring discoloration, warping, or humidity staying high, act quickly. Fast testing lets you confirm conditions, guide repairs, and keep your recovery on track.
How Burst Pipe Water Leads to Mold
Once a pipe bursts, water can spread into drywall, insulation, subfloors, and framing within minutes, creating the damp conditions mold needs to grow.
You’re dealing with water damage that often hides inside cavities, where air can’t dry materials fast enough. Mold spores are already present indoors, so when moisture stays above safe levels, they settle and multiply on cellulose-based surfaces.
Warm temperatures and trapped humidity speed this process, especially behind finishes and under flooring. Even small leaks can feed mold growth if you don’t remove wet materials and dry the structure quickly.
That’s why your team should treat burst pipe water as a contamination risk, not just a cleanup issue. Fast drying, isolation, and testing help protect your space and keep your community resilient.
Signs of Mold in Wet Areas
You can spot mold in wet areas by checking for visible discoloration on walls, ceilings, baseboards, and flooring.
You may also notice a musty odor, even when surface stains look minor.
If materials stay persistently damp after a pipe burst, mold can start growing and spreading quickly.
Visible Discoloration
Even after the water dries, visible discoloration can point to mold growth in damp areas around a burst pipe. You should inspect walls, baseboards, and subflooring for stains that don’t match the surrounding material.
Look for discoloration patterns that spread, darken, or reappear after drying. Different mold types can produce green, black, brown, or white marks, so don’t assume one color tells the whole story.
- Check for rings, blotches, or streaks.
- Compare affected spots with clean surfaces nearby.
- Document changes with photos and dates.
If you notice patchy or uneven coloration, you’re not overreacting—you’re catching a problem early.
Testing helps confirm whether the stain is only water damage or active mold, so you can act with confidence and protect your space.
Musty Odors
A musty, damp odor often signals mold activity after a pipe burst, especially in enclosed spaces where moisture lingers.
You may notice musty smells before you see any visible growth, so trust your nose and inspect nearby walls, flooring, and contents.
When the odor stays localized, it can point to hidden mold colonies in drywall voids, baseboards, or under cabinets.
Don’t mask the issue with air fresheners; they won’t solve it. Instead, document the smell, limit access to the area, and arrange testing if the odor persists.
Quick action supports mold prevention and helps you protect shared spaces, belongings, and indoor air quality.
If your team notices the scent, treat it as a warning sign and respond quickly together.
Persistent Dampness
When damp surfaces stay wet long after the pipe burst, mold can start to spread in hidden layers of drywall, flooring, insulation, and trim. You’ll often see persistent dampness in damp environments where moisture retention keeps materials from drying out.
Check for soft drywall, swollen baseboards, and cool, clammy floors. Watch for repeated wet spots after cleanup; that means water may still be trapped.
- Press the area and note if it rebounds slowly.
- Lift edges of flooring for discoloration or odor.
- Measure humidity; high readings support mold growth.
If you detect these signs, act fast. Dry the area completely, remove damaged materials, and test suspect spots before repairs.
You’re not overreacting—you’re protecting your space and everyone in it.
What Inspectors Look For After Water Damage
After a pipe burst, inspectors look for visible water intrusion, hidden moisture, and early signs of mold growth in drywall, insulation, subfloors, framing, and HVAC components.
You’ll usually see them map damage zones, check staining, and probe materials for softness or swelling. They use inspection techniques like moisture meters, thermal imaging, and targeted openings to confirm what’s trapped behind surfaces.
You’re not just looking for wetness; you’re identifying conditions that support different mold types, especially in cool, damp cavities. Inspectors also note musty odors, rust, peeling paint, and dust accumulation near vents.
If you’re part of a repair plan, this careful review helps your team act fast, reduce spread, and keep your space safer.
How Mold Testing After a Burst Pipe Works
Once the wet materials and likely damage zones are identified, mold testing shows whether growth has started and where it’s concentrated.
You’ll use targeted testing methods to compare indoor air or surface samples against normal background levels. This helps you and your crew focus on the right areas without guessing. Results also point to mold types that may follow a burst pipe, including moisture-loving species on drywall, framing, and insulation.
Typical steps include:
- collecting air samples near affected rooms
- taking swab or tape samples from visible spots
- sending samples to a lab for analysis
With clear data, you can confirm the problem, document conditions, and plan a cleanup that fits your home and your people.
When to Test Before Cleanup Ends
You should test for mold before cleanup ends if hidden moisture may still be trapped in wall cavities, subfloors, or insulation.
Testing at this stage helps you confirm whether drying is complete and whether any concealed growth remains active.
You’ll also want results before final repairs start, so you don’t seal in a moisture problem.
Hidden Moisture Checks
Before cleanup wraps up, check for hidden moisture in wall cavities, subfloors, insulation, and behind trim, because surface drying can mask lingering damp materials that support mold growth.
You should use moisture detection tools before you close walls or install finishes. This step helps you protect your space and stay aligned with your team’s cleanup plan.
- Probe suspect materials with a pin meter.
- Scan cool, swollen, or stained areas.
- Compare readings with dry reference spots.
If hidden moisture remains, test again after targeted drying. You’re not guessing; you’re confirming that the structure is truly dry.
That reduces the chance that mold keeps developing out of sight. When you verify conditions early, you help everyone move forward with confidence, without missing the moisture that matters.
Before Final Repairs
If cleanup is nearly complete but repairs haven’t started yet, test for mold before you close walls, replace finishes, or reinstall insulation.
You’ll catch hidden growth while materials are still exposed, which lets you fix the source and keep the job moving. This step protects your crew, your home, and your budget because it confirms the dry-out actually worked.
Use inspection, air sampling, or surface testing as needed, then document results before rebuilding. If testing shows contamination, remove affected materials and dry the cavity again.
If it’s clear, you can proceed with confidence and keep everyone on the same page. These mold prevention strategies support safe reassembly and simplify post repair maintenance.
What to Do If Mold Is Found
Contain the mold problem quickly to limit spread and exposure. You should isolate the affected area, stop moisture sources, and document visible growth before anyone disturbs it.
If the damage is larger than a small patch, call a licensed mold remediation specialist so your team stays protected and the work meets standards. Mold can raise health risks, especially for people with asthma, allergies, or weakened immunity, so limit access until cleanup is done.
- Seal vents and doors with plastic sheeting.
- Remove wet materials that can’t be dried.
- Run dehumidifiers and monitor humidity.
After removal, verify drying with moisture meters and inspect hidden cavities. Keep samples and reports for your records, and don’t reinstall finishes until the area tests clean.
Frequently Asked Questions
How Quickly Can Mold Start Growing After a Pipe Burst?
You can see mold start within 24 to 48 hours after a pipe burst; your mold growth timeline depends on water damage factors like humidity, temperature, and materials, so you’ll need fast drying and inspection.
Can Hidden Mold Spread Through HVAC Systems?
Yes, hidden mold can spread through your HVAC system, contaminating ducts and reducing air quality. You should inspect promptly, support mold prevention, and keep your space safe so you’re breathing cleaner air together.
Does Homeowners Insurance Cover Mold Testing Costs?
Sometimes, yes—like a coin toss in a storm. You’ll need to check your insurance policies for mold coverage, because many homeowners plans limit testing costs unless the damage stems from a covered loss.
Which Rooms Are Most Vulnerable After Plumbing Leaks?
Bathrooms and kitchens are most vulnerable after plumbing leaks, due to bathroom vulnerabilities around tubs, toilets, and showers, plus kitchen risks beneath sinks, dishwashers, and refrigerators. You’ll also want to check basements, laundry rooms, and closets.
Can Mold Return After a Professional Cleanup?
Yes, mold can return after professional cleanup if moisture remains or materials weren’t fully dried. You should verify cleanup effectiveness, monitor humidity, and inspect hidden cavities to prevent mold resurgence and protect your home together.
Recap
After a pipe bursts, you can’t assume the danger is gone once the water’s wiped up. Hidden moisture can turn walls and insulation into a mold nursery in days, so testing gives you proof, not guesses. Inspect early, test before cleanup wraps up, and act fast if spores are found. That way, you protect your home, your health, and your budget before a small leak becomes a bigger headache.