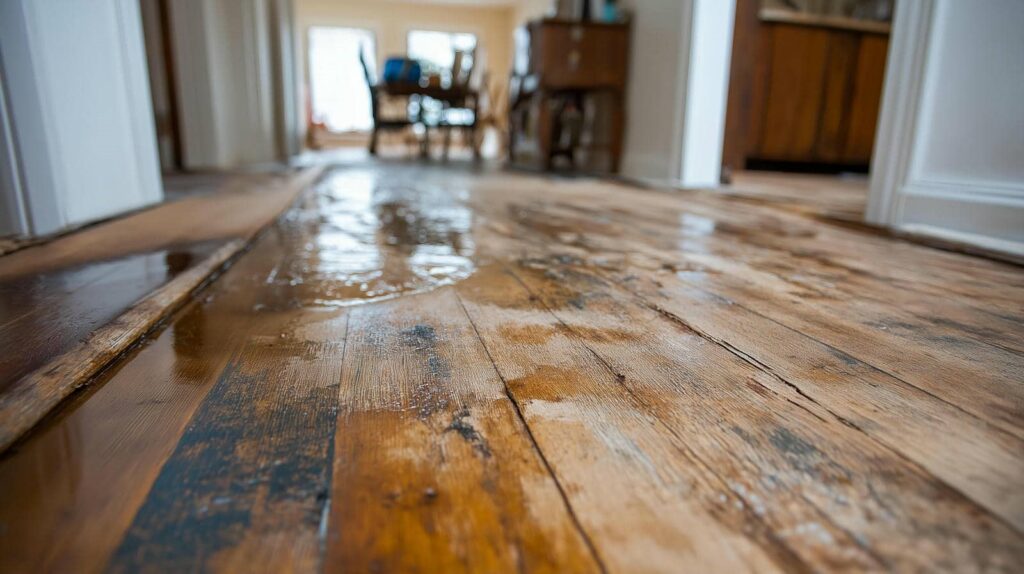
Flood water can cause significant damage if not addressed promptly, making effective removal techniques essential for any homeowner. Understanding the right steps to take after a flood can save you time, money, and stress. From utilizing high-capacity wet/dry vacuums to employing submersible pumps, each method has its advantages. So, what are the best practices you can implement to tackle this challenge head-on and safeguard your home? Let’s explore the most practical techniques for flood water removal.
Key Takeaways
- Assess flood damage to determine the extent of water intrusion and prioritize areas for removal.
- Use a high-capacity wet/dry vacuum for efficient water suction, complemented by buckets for manual removal.
- Employ submersible pumps for deeper water areas, ensuring all standing water is removed promptly.
- Enhance air circulation with fans and dehumidifiers to promote drying and prevent mold growth.
- Clean surfaces with a water-detergent mixture, sanitizing tools afterward to eliminate contaminants.
Immediate Steps to Take After a Flood
After a flood, it’s essential to act quickly to minimize damage and ensure safety. Your immediate response is critical.
First, verify your safety by checking for structural damage and avoiding standing water, which may be electrically charged or contaminated. Disconnect power sources if it’s safe to do so.
Once you’re secure, document the flood aftermath by taking photos of damage for insurance purposes. Ventilate your home to reduce mold growth by opening windows and doors.
Remove wet items and furnishings, as they can harbor bacteria and odors.
Finally, communicate with neighbors and local authorities to stay informed about resources and assistance available in your community. Your proactive actions can make a significant difference in the recovery process.
Gathering Essential Tools for Water Removal
Before you start removing flood water, it’s vital to gather the right tools.
You’ll need equipment like pumps, wet vacuums, and buckets, along with safety gear such as gloves and rubber boots to protect yourself.
Having these essentials on hand will make the water removal process more efficient and safer.
Essential Tools Overview
When tackling flood water removal, having the right tools at your disposal can make all the difference. Start with a high-capacity wet/dry vacuum; it’s essential for sucking up standing water quickly.
You’ll also need sturdy buckets for manual removal of excess water, and a mop for those hard-to-reach spots. Don’t forget heavy-duty fans and dehumidifiers to dry out the affected areas, helping to prevent further water damage.
A moisture meter can help you assess the extent of the issue. If you have flood insurance, keep your policy handy to discuss coverage for any repairs needed after the cleanup.
With these tools, you’ll be well-equipped to tackle the aftermath of flooding effectively.
Safety Gear Considerations
Proper safety gear is essential for anyone involved in flood water removal, as it protects you from hazardous conditions.
To ensure your flood safety, gather the following personal protective equipment:
Rubber boots: These keep your feet dry and protect against sharp objects.
Gloves: Waterproof gloves shield your hands from contaminants and chemicals.
Safety goggles: Protect your eyes from debris and splashes while working.
Face mask: A mask or respirator helps filter out harmful mold spores and dust.
Effective Water Removal Techniques
Although dealing with floodwater can be intimidating, employing effective water removal techniques can considerably ease the process.
Start with a thorough flood damage assessment to gauge the extent of the water intrusion. This helps you prioritize your efforts.
Use water extraction methods like submersible pumps for deeper areas and wet/dry vacuums for smaller spaces. Make certain you remove as much water as possible before moving on to drying.
Fans and dehumidifiers can help speed up the drying process and prevent mold growth.
Remember to check hidden areas like basements and crawl spaces, as stagnant water can hide there.
Maximize Your Wet/Dry Vacuum’s Effectiveness
To effectively tackle floodwater, maximizing your wet/dry vacuum’s capabilities can make a significant difference in the cleanup process.
Here are some vacuum maintenance tips and suction power tricks to help you get the most out of your equipment:
Check the filter: Make certain it’s clean and free of debris for peak airflow.
Use the right attachment: Choose the best nozzle for the surface you’re cleaning, like a wide-mouth for large areas.
Empty the tank frequently: Keeping it less than half full maintains suction power and efficiency.
Seal leaks: Inspect hoses and connections for any cracks to prevent loss of suction.
DIY Sump Pump for Flood Water Removal
Creating a DIY sump pump can be a practical solution for removing flood water from your home.
You’ll need a few materials and tools, and following a step-by-step installation guide will ensure you set it up correctly.
Plus, we’ll cover maintenance tips to help your sump pump last longer and work efficiently.
Required Materials And Tools
When tackling flood water removal with a DIY sump pump, you’ll need a few essential materials and tools to get the job done effectively.
First, conduct a flood damage assessment to determine the extent of the water issue.
Then, gather the following items to implement effective water extraction methods:
- Sump Pump – Choose a submersible or pedestal pump based on your needs.
- Hoses – Get sturdy hoses to direct the water away from your home.
- Extension Cord – Confirm it’s rated for outdoor use to power the pump safely.
- Buckets or Containers – These can help collect excess water during the process.
Having these materials on hand will make your flood water removal efforts smoother and more efficient.
Step-By-Step Installation Guide
With your materials and tools ready, it’s time to install the DIY sump pump for effective flood water removal.
First, choose a low point in your basement or crawl space. Dig a hole about two feet deep and verify it’s wider than your sump basin. Place the basin in the hole, leveling it with the ground.
Next, connect the sump pump to the drainage pipe and insert it into the basin. Make sure the discharge pipe directs water away from your home.
Finally, plug in the pump and test it by adding water to the basin. This DIY flood solution is a fantastic way to employ water removal techniques that keep your space dry and safe.
Enjoy your peace of mind!
Maintenance Tips For Longevity
Though you’ve successfully installed your DIY sump pump, regular maintenance is essential to secure its longevity and reliability.
By performing preventative maintenance and routine inspections, you can avoid unexpected failures. Here are four tips to keep your sump pump in top shape:
Check the Power Source: Verify the pump is connected and functioning properly, replacing any damaged cords.
Inspect the Pump: Clean the inlet screen and check for any debris that may block water flow.
Test the Float Switch: Make sure it moves freely and activates the pump without obstruction.
Examine the Discharge Pipe: Look for clogs or leaks, ensuring water is directed away from your foundation.
Using Natural Materials to Absorb Water
Natural materials can be incredibly effective for absorbing flood water, providing an eco-friendly solution to a pressing problem.
One of the best options is bamboo charcoal, known for its high absorbent properties. Simply place bags of bamboo charcoal around the affected area to help soak up moisture and reduce odors.
Another great choice is cat litter, particularly the clumping type. Sprinkle it generously over wet surfaces, and it’ll absorb water quickly while making cleanup easier.
Both materials are effective and safe for the environment, making them perfect for anyone wanting to contribute positively to their community.
Drying and Dehumidifying Your Space
Once you’ve absorbed as much water as possible using natural materials, it’s essential to focus on drying and dehumidifying your space to prevent mold growth and further damage.
Here are some effective ventilation techniques and moisture control methods:
Open windows and doors: This encourages airflow and helps lower humidity levels.
Use fans: Position fans to create cross-ventilation, speeding up the drying process.
Dehumidifiers: Invest in a dehumidifier to draw excess moisture from the air, especially in enclosed spaces.
Heat: Increase the temperature in your space to accelerate evaporation, while ensuring proper ventilation.
Essential Steps to Prevent Mold Growth Post-Water Removal
To effectively prevent mold growth after removing floodwater, you need to act quickly and systematically.
Start by thoroughly drying affected areas using fans and dehumidifiers, as proper air circulation is vital for mold prevention. Make certain that all surfaces, including walls, floors, and furniture, are completely dry within 24-48 hours. Don’t forget to check hidden spots like under carpets and behind baseboards.
Next, clean surfaces with a mixture of water and detergent to eliminate any remaining spores. Consider applying a mold-resistant sealant on porous materials.
If humidity levels are high, use a dehumidifier to maintain ideal indoor conditions.
Finally, regularly inspect your space for any signs of mold, so you can address issues promptly and keep your home safe.
When to Call in Professional Help for Severe Flooding?
After taking steps to prevent mold growth in your home, it’s important to recognize when the situation might be beyond your control and requires professional intervention.
Here are four signs that indicate it’s time to call for help:
Extensive Flood Damage: If water levels are above the floorboards, it’s likely too much for DIY methods.
Structural Concerns: Notice any sagging ceilings or walls? This could indicate underlying issues needing a pro’s assessment.
Persistent Moisture: If your space remains damp after your efforts, professionals have specialized equipment for thorough drying.
Health Risks: If you notice mold growth or smell musty odors, it’s essential to have a professional assess the situation.
Don’t hesitate to reach out; your safety and home are worth it!
Final Thoughts
In the aftermath of a flood, taking swift action can feel like battling a tidal wave, but you have the power to reclaim your space. By following these DIY techniques, you can effectively remove water and safeguard your home from mold. Remember, thoroughness is key—don’t overlook hidden areas. If the situation feels overwhelming, don’t hesitate to call in professionals. Your home deserves to be restored, and you’re not alone in this fight against water damage.