
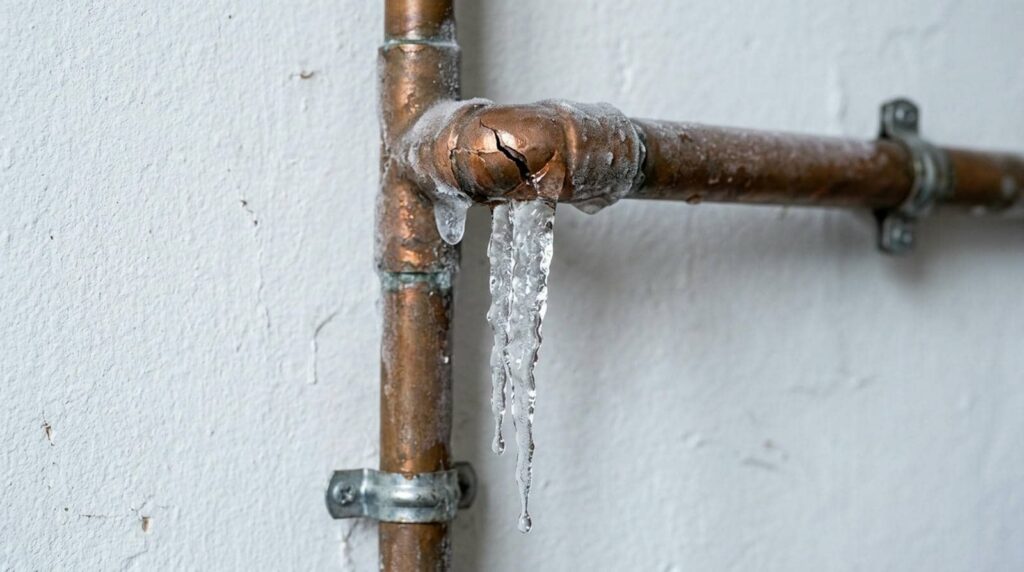
Key Takeaways
- Shut off the main water and electricity, then move valuables and gather basic cleanup tools.
- Extract standing water quickly with pumps, wet vacs, towels, and mops to limit further damage.
- Remove soaked drywall, insulation, flooring, and other porous materials that cannot dry safely.
- Dry and sanitize the area with dehumidifiers, air movers, and disinfectant while checking moisture levels.
- Document damage, inspect for mold, verify leaks are fixed, and monitor the space for several days.
Shut Off Water and Protect the Area
First, shut off the main water supply to stop the leak from spreading. Then turn off electricity to any affected areas if water is near outlets or appliances.
You stop water flow fast, then check the pipe and surrounding joints for active spraying or drips. If you can reach the valve safely, close it fully and confirm the line pressure drops.
Move furniture, rugs, and electronics out of the area to limit damage. Lay down towels or plastic sheeting along doorways to keep water from spreading into other rooms.
Gather emergency tools such as a flashlight, gloves, bucket, wrench, and tape so you’re ready for repairs.
Work with your household as a team, stay calm, and keep the area clear so everyone can move safely.
Extract Standing Water Quickly
Start removing standing water as soon as the area is safe to enter, because the longer it sits, the more it soaks into flooring, baseboards, and drywall.
Use wet vacs, squeegees, and pump tools as your first water extraction techniques, moving water toward a drain or doorway. Work in overlapping passes so you don’t miss low spots, and empty the machine before it loses suction.
If the volume is high, call your emergency response team or a trusted restoration pro fast. You can also use mops and towels for corners and edges where equipment can’t reach.
Keep cords out of water, wear rubber boots, and monitor the floor for soft spots. Fast extraction helps you stay in control and supports your crew through the cleanup process.
Remove Damaged Materials
Assess the damage to drywall, insulation, flooring, and trim before you start removal, and mark any materials that stay wet or show swelling, staining, or mold.
Cut out soaked drywall and other porous components that can’t dry fully, then bag and remove them from the work area.
Dispose of contaminated items per local waste rules, and keep salvageable materials separate so you don’t cross-contaminate the space.
Assess Material Damage
Water-damaged materials can hide bigger problems, so inspect drywall, insulation, flooring, baseboards, and trim for swelling, warping, soft spots, staining, or mold growth.
Mark each damaged area before you remove anything, and photograph it for insurance claims and water damage documentation. You should test materials with a probe or your hand; if they flex, crumble, or smell musty, they likely need replacement.
Check both visible surfaces and hidden edges near the leak path, since moisture often spreads farther than you expect.
Separate salvageable items from ruined ones right away, and keep wet debris away from dry areas. This helps you work with your crew, protect the space, and avoid recontamination.
When in doubt, treat compromised materials as unsalvageable until a qualified inspector confirms otherwise.
Remove Soaked Drywall
Once you’ve marked the damaged areas, cut out any drywall that stayed wet long enough to lose structural integrity. Use a utility knife or oscillating tool to remove sections cleanly, following studs so you can prep for drywall replacement.
Keep your cuts a few inches above the highest visible stain, because hidden wicking can extend beyond the surface. Check the cavity with moisture measurement before you close anything back up; if readings stay elevated, keep the area open and dry it further.
Stay focused on the exposed framing and insulation, and trim back only what’s necessary. You’re not fixing everything at once—you’re setting up a solid, shared starting point for the rest of the repair.
Accurate removal now helps your team avoid future mold, sagging, and patch failures.
Dispose of Contaminated Items
Bag contaminated debris as you remove it, and keep wet drywall, insulation, carpet padding, and other porous materials separate from salvageable items.
You should wear gloves, a mask, and eye protection so you can work safely with the crew. Seal bags or bins before you move them, and label them for contaminated disposal to prevent cross-contamination.
Check each item for swelling, mold odor, or hidden wetness; if you can’t dry it quickly and fully, discard it.
Clean hard surfaces after removal with an approved disinfectant, then let them dry.
Keep children and pets out of the area until the cleanup zone is clear.
This process protects item safety, reduces odor, and helps your home get back to normal faster.
Dry Walls, Floors, and Hidden Cavities
You need to dry wall cavities with air movers and dehumidifiers so moisture doesn’t stay trapped behind the surface.
Extract water from floors quickly, then monitor subfloors for residual dampness.
Check hidden spots with a moisture meter and keep drying until readings return to normal.
Drying Wall Cavities
After you stop the leak and remove standing water, dry the wall cavities, floors, and other hidden spaces as quickly as possible to prevent mold, swelling, and structural damage.
Remove baseboards, drill small vent holes if needed, and use fans plus dehumidifiers to move air through the cavity.
Check moisture control with a meter so you can track progress, not guess.
If insulation types are soaked, pull them out when they can’t dry fast enough; wet batts trap water and slow recovery.
Keep the room warm and closed off from humid air, but don’t seal damp materials inside.
Inspect framing daily for lingering moisture, odor, or softness.
You’re not handling this alone—steady drying steps protect your home and help your crew restore it safely.
Floor Moisture Removal
Once the wall cavities are drying, pull moisture out of the floors and hidden gaps so water doesn’t linger under flooring or subfloors.
You should lift wet rugs, remove base shoe, and create airflow across the exposed edge. Use moisture detection to verify where water has spread before you set dehumidifiers or air movers.
If the finish floor traps water, you may need to open seams or remove sections to reach the underlayment. Choose drying methods that match your flooring options, because wood, laminate, and vinyl each respond differently.
Keep heat moderate and maintain steady circulation to protect adhesives and reduce warping. Work with your crew, stay methodical, and confirm dry readings at the surface and below it before you close anything up.
Hidden Damp Spot Checks
Even when surfaces feel dry, check for trapped moisture inside wall cavities, floor seams, and other hidden voids with a moisture meter or thermal imaging.
You’ll catch problems early by scanning baseboards, outlets, trim, and subfloor edges. Use damp detection techniques in a grid pattern, then log readings for moisture mapping so you can compare hot spots and track drying progress.
If one area stays elevated, open the cavity, ventilate it, and dry the framing before you close it back up.
Don’t trust touch alone; hidden damp can feed mold and weaken materials. Stay systematic, and you’ll protect your space with the same careful approach your crew would use.
Sanitize Affected Surfaces
Use a disinfectant designed for water-damaged surfaces to sanitize all areas the burst pipe touched, including floors, baseboards, walls, and nearby fixtures.
Wear gloves, ventilate the room, and follow the label’s dwell time so the cleaning agents work properly. After wiping, rinse if directed, then dry each surface with clean towels or a fan.
You’ll want to sanitize surfaces in sections, so nothing gets missed and your cleanup stays organized. Use fresh cloths for each zone to avoid spreading residue.
If any item can’t be cleaned safely, set it aside for disposal or professional treatment.
When you work methodically, you protect your space and help everyone in the home feel confident that the area’s been handled correctly.
Check for Mold and Repairs
After the area is dry, inspect it closely for mold growth and any damage that needs repair. Check baseboards, drywall, insulation, and subfloors for discoloration, musty odor, or soft spots.
If you spot mold, contain the area and use proper mold prevention steps so spores don’t spread. Small patches may need cleaning, but larger growth often needs a licensed specialist.
Next, document warped materials, cracked joints, and loose fasteners. Use repair techniques that match the material: replace soaked drywall, resecure trim, and reseal openings around pipes.
Verify that leaks are fully stopped before closing walls. Keep the space ventilated and dry, and monitor it over the next few days. This helps protect your home and keeps your cleanup team confident.
Frequently Asked Questions
How Do I Prevent Future Pipe Bursts in Winter?
Insulate exposed pipes and seal drafts now. During winter preparation, you’ll keep water moving by maintaining a steady indoor temperature, draining outdoor lines, and opening cabinet doors. You’re protecting your home and your community.
What Should I Do if the Burst Pipe Is Behind a Wall?
You should shut off water, then test the theory that the leak’s exact spot matches visible staining; it often doesn’t. You’ll need pipe access, then cut carefully, inspect, and limit wall damage while you call a plumber.
Does Homeowners Insurance Cover Burst Pipe Damage Cleanup?
Usually, yes—your insurance policy may cover sudden burst-pipe cleanup, but coverage limits apply. You’ll need to document damage, mitigate losses, and confirm exclusions with your insurer so you don’t face surprise costs.
Can I Safely Use Bleach on All Water-Damaged Surfaces?
No, you can’t safely use bleach on all water-damaged surfaces. If you’ve got drywall basement, choose bleach alternatives for wood and fabric; they support mold prevention without damaging porous materials or trapping moisture.
When Should I Call an Emergency Plumber Versus a Restoration Company?
Call an emergency plumber if water’s actively leaking, pressure drops, or plumbing safety is at risk; call a restoration company after shutdown for drying, cleanup, and emergency response. You’ll protect your home faster together.
Summary
When a pipe bursts, you act fast and work methodically. Shut off the water, clear the standing water, and strip out soaked materials before they spread damage. Then dry the space until every wall, floor, and hidden cavity feels crisp and stable. Sanitize surfaces, watch for mold, and confirm repairs. With each step, you turn a soaked, damaged room into a clean, safe space ready to rebuild.