
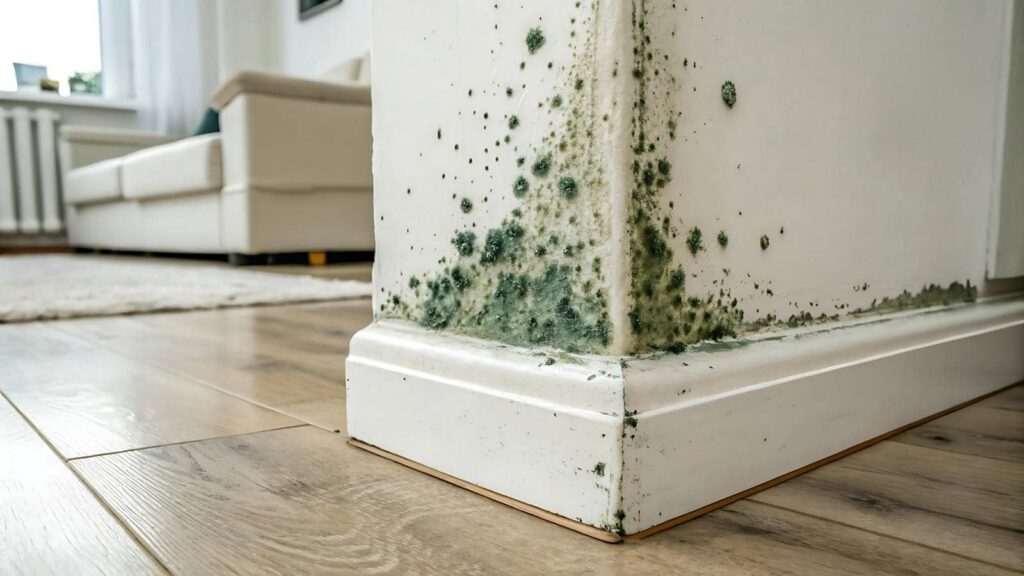
Inspect Mold After Extraction is a critical step after water removal because hidden moisture can remain in wall cavities, subfloors, and insulation. You may not see obvious growth at first, but humidity, staining, and musty odors can signal active colonies. A proper inspection helps you verify drying, protect repairs, and catch contamination before it spreads. What gets missed here often determines whether the space recovers cleanly or needs further remediation.
Key Takeaways
- Hidden moisture can remain after extraction, allowing mold to grow behind walls, under flooring, or in insulation.
- Inspecting early finds active mold before it spreads or affects indoor air quality.
- Moisture meters help check framing, baseboards, drywall, and HVAC surfaces for trapped dampness.
- Musty odors, staining, or soft materials can signal mold persistence and should be documented.
- Proper inspection verifies surfaces are dry and clean before sealing cavities or starting repairs.
Why Inspect Mold After Water Extraction
After water extraction, you should inspect for mold because residual moisture can remain in cavities, under flooring, and behind wall finishes even when surfaces look dry. You can’t rely on appearance alone.
A prompt inspection helps you identify active colonies before mold spores spread through occupied spaces and compromise air quality. You should check framing, baseboards, insulation, and HVAC-adjacent surfaces with a moisture meter and visual confirmation.
If you find staining, musty odor, or soft materials, document the area and isolate it for further evaluation. This step protects your workspace, supports your team’s health, and keeps remediation focused and efficient.
When you act early, you strengthen your building’s recovery and help everyone feel confident that the environment is safe again.
How Hidden Moisture Causes Mold Growth
You need to check for moisture trapped behind walls, under flooring, and inside insulation after extraction, because these hidden areas can stay wet long after surfaces feel dry.
Damp materials such as drywall, wood, and carpet padding create the conditions mold needs to start colonizing.
If you miss a hidden leak, moisture can keep spreading and sustain growth even after the visible water is gone.
Moisture Traps Behind Walls
When water seeps into wall cavities during an extraction, it can linger behind drywall, baseboards, and insulation, creating moisture traps that support mold growth.
You need a thorough wall inspection to find these hidden pockets before they spread. Use moisture detection tools, including meters and thermal imaging, to map wet zones and confirm where water remains.
Check seams, outlets, trim, and lower wall sections, since these areas often retain moisture after visible surfaces look dry.
If you belong to a team handling restoration, communicate findings fast so everyone can act on the same data. Seal off affected areas, document readings, and recheck until the cavity reaches normal dry conditions.
Careful verification helps you stop mold at the source and protect the space.
Damp Materials Fuel Growth
Hidden moisture in drywall, insulation, wood, and subflooring keeps materials damp long after the visible surface dries. That residual moisture gives mold the conditions it needs to colonize. You should treat these materials as active reservoirs of moisture retention, not just wet surfaces.
In damp environments, spores absorb water from porous building assemblies and begin growing within the matrix, where airflow is limited and drying is slow. Inspect with a moisture meter, confirm elevated readings, and document affected areas before you close any wall or floor cavity.
If you leave damp materials in place, you’re preserving the conditions mold prefers. You belong to the group that verifies dryness, replaces saturated components, and restores safe indoor conditions with clear, measured action.
Hidden Leaks Keep Spreading
A concealed leak can keep feeding mold long after you’ve finished extraction, especially when water travels through framing, insulation, or behind finishes where you can’t see it. You need disciplined leak detection and moisture mapping to confirm every hidden source is dry.
Check baseboards, wall cavities, ceiling penetrations, and plumbing chases for elevated readings, staining, or soft materials. Use infrared imaging, pin meters, and targeted openings to verify conditions before you close anything.
- Trace wet pathways from source to finish
- Measure adjacent cavities, not just visible surfaces
- Document readings at each affected area
- Dry concealed spaces with directed airflow
- Reinspect until moisture returns to normal
When you verify hidden areas, you protect your space and keep your cleanup crew aligned.
Signs Mold Survives Cleanup
Even after extraction and basic cleanup, mold can remain if moisture, porous materials, or contaminated dust weren’t fully addressed.
You may notice a musty odor, faint discoloration, or recurring spotting on drywall, trim, or insulation. Different mold types can persist in hidden cavities, and you shouldn’t ignore health risks, like irritation, coughing, or headache, when symptoms return indoors.
Check for warped materials, soft surfaces, or dust that reappears after wiping; these signs suggest spores survived. If humidity stays elevated, colonies can reactivate quickly.
You belong in a dry, stable space, so verify that all affected areas are fully dry and clean. When visible growth comes back, treat it as a signal that the cleanup left a source behind.
What Inspectors Check After Water Damage?
After water damage, you’ll inspect for visible mold growth on surfaces, around trim, and inside affected cavities.
You’ll also test for hidden moisture sources behind walls, under flooring, and in insulation, since trapped water can sustain growth.
Finally, you’ll assess structural material damage in drywall, framing, subfloors, and sheathing to determine what needs removal or repair.
Visible Mold Growth
Visible colonies often reveal the first clues an inspector uses after water damage, and you should look for them on drywall, insulation, baseboards, subfloors, and framing where moisture lingered.
You can confirm visible mold by checking color, texture, and spread patterns during mold identification, then note any fuzzy, slimy, or powdery growth. Keep your review systematic so you and your team stay aligned and confident.
- Dark spots along baseboards
- White film on insulation
- Green patches on drywall seams
- Black speckling on framing members
- Musty staining near subfloors
Document each area with photos, measurements, and location notes. If colonies cluster at joints or edges, mark them for removal and follow-up cleaning.
Clear records help everyone on site share the same standard.
Hidden Moisture Sources
When visible growth points to a larger problem, you should trace the moisture source that fed it, because mold often spreads beyond the obvious damage.
You inspect behind baseboards, under flooring edges, around window frames, and near plumbing penetrations where leaks can hide. Use moisture detection tools to compare affected and unaffected areas, and note elevated readings that reveal trapped dampness after the surface looks dry.
Check HVAC condensate, roof intrusion, appliance drips, and poorly sealed gaps, since each can sustain growth.
You also verify ventilation patterns and humidity levels to confirm the area won’t re-wet. This focused search supports mold prevention by helping you remove the conditions mold needs to return.
When you identify the source early, you protect your space and your team.
Structural Material Damage
You inspect structural materials for softening, warping, delamination, cracking, and loss of load-bearing integrity, because water damage can compromise more than just the surface.
You verify framing, subflooring, drywall, and sheathing for structural integrity, using probing, moisture readings, and visual mapping. If you find swelling or separation, you document the extent and isolate affected areas fast.
You also check fasteners, joints, and connections for corrosion or looseness, since weakened assemblies can shift under normal use. Protect material safety by confirming whether members can dry in place or need replacement.
- Softened studs
- Buckled subfloor panels
- Cracked load paths
- Separated laminate layers
- Rusted connectors and anchors
How Inspection Protects Repairs
A thorough mold inspection after extraction helps protect repairs by confirming that moisture sources, hidden growth, and contaminated materials are fully addressed before rebuilding begins.
You reduce the chance of repeat damage when you verify framing, insulation, drywall, and finish surfaces are dry and clean.
In proper mold remediation, you also document conditions so your contractor can rebuild on a stable substrate. That step protects your investment and keeps the work aligned with your team’s standards.
You’re also reducing health risks tied to trapped moisture and residual contamination, which can undermine indoor air quality after the repair.
When you inspect carefully, you help your home stay ready for durable, lasting restoration that fits your community’s expectations for safety and quality.
When to Schedule Mold Testing
Schedule mold testing after extraction if inspection reveals persistent staining, musty odors, visible growth, or materials that stayed wet long enough to support contamination.
You should also plan mold testing when drying logs show delays, because timing considerations affect how well results represent the post-extraction condition.
- Damp drywall near the baseboard
- Carpet padding with a sour odor
- Hidden cavities behind cabinets
- HVAC returns carrying dusty debris
- Ceilings with repaired water marks
Use a qualified inspector to collect samples before you replace finishes or seal surfaces. That way, you join the group of owners who verify cleanup instead of guessing.
If the site still smells off, test promptly; if conditions are stable and dry, your technician may advise a short wait to improve interpretation.
Frequently Asked Questions
Can Mold Return After Professional Drying?
Yes, mold can return after professional drying if you miss hidden dampness. You should control mold resurgence factors with moisture management techniques, inspect framing, and verify humidity stays low for lasting protection and peace of mind.
Do Air Scrubbers Remove All Mold Spores?
No, you can’t rely on air scrubbers to remove all mold spores; air scrubber effectiveness depends on mold spore types, filtration, and airflow. You’ll need source removal, containment, and verification for real control.
Should HVAC Ducts Be Inspected After Extraction?
Yes, you should inspect HVAC ducts after extraction. You’ll verify contamination hasn’t spread, confirm duct inspection results, and support effective mold remediation. That keeps your system safe, clean, and aligned with your team’s standards.
How Soon Can Mold Spread After Flooding?
Mold growth can start within 24 to 48 hours after flooding, especially with flood damage trapped in porous materials. You should dry affected areas immediately, inspect hidden spaces, and act fast to protect your home.
Is Visible Mold Always Dangerous?
No, visible mold isn’t always dangerous, but you shouldn’t ignore it, like smoke from a small fire. You’ll assess mold types and mold health, then clean, contain, and verify drying to protect your space.
Conclusion
After water extraction, you still need to inspect for mold because damp pockets can quietly invite unwanted growth in hidden spaces. You should check for musty odors, staining, and elevated moisture so you can catch trouble before it settles in. A careful inspection helps you protect repairs, preserve indoor air quality, and avoid larger remediation costs. When you verify conditions are truly dry, you give your property the best chance to stay clean and sound.