When a pipe bursts, you need to act fast because water spreads through framing, insulation, and wiring in minutes. You can shut off the supply, remove standing water, and dry concealed spaces before moisture drives mold growth or structural damage. The real issue isn’t just the visible flood; it’s the hidden damage that keeps developing after the leak stops.
Key Takeaways
- Burst pipe mitigation matters because shutting off water quickly limits flooding and reduces overall property damage.
- Fast water extraction and drying prevent moisture from spreading into walls, floors, and hidden cavities.
- Rapid mitigation lowers the risk of mold growth, swelling, warping, and other material deterioration.
- Immediate electrical safety steps help prevent short circuits, shocks, and further infrastructure damage.
- Early documentation and professional assessment support accurate repairs, insurance claims, and future prevention.
Burst Pipe Water Mitigation Steps
When a pipe bursts, you need to act fast to limit water migration and secondary damage. First, shut off the main water supply and isolate the affected area if you can do so safely.
Next, protect electrical hazards by switching off power to wet zones. Then document visible damage for your records and claims.
Begin water extraction immediately with pumps or vacuums, then remove saturated materials that can’t dry properly. Promote airflow with fans and dehumidifiers to stabilize moisture levels.
After the area dries, arrange pipe repair to restore service and prevent repeat failure. You’re not handling this alone; these steps help your team stay organized, reduce losses, and return the space to safe, usable condition with minimal disruption.
Why Burst Pipe Damage Spreads Fast
When a pipe bursts, water can spread across floors and rooms in minutes, so you need to act before the affected area expands.
It also follows hidden structural paths inside wall cavities, subfloors, and ceiling assemblies, where you may not see the damage right away.
Porous materials like drywall, insulation, and wood absorb moisture quickly, which accelerates deterioration and raises the risk of secondary damage.
Rapid Water Spread
A burst pipe can flood a space in minutes because pressurized water escapes continuously until you shut off the supply.
Once the pipe fails, water flow accelerates across floors, under trim, and into absorbent materials that quickly lose capacity.
You need emergency response actions right away: close the main valve, cut power to affected areas, and begin extraction before saturation deepens.
Every minute increases migration, swelling, staining, and microbial risk.
Because you’re part of a team that values fast recovery, clear coordination matters.
Identify the source, document the loss, and set drying equipment early so moisture doesn’t linger.
Rapid intervention limits damage, protects finishes, and keeps your home or business on a faster restoration path.
Hidden Structural Paths
Even after you stop the visible flow, water often keeps moving through concealed structural routes such as wall cavities, framing voids, subfloors, insulation, and chases around plumbing and wiring.
You may think the leak’s over, but hidden moisture can travel laterally and downward, tracking gravity, seams, and penetrations. That spread can compromise structural integrity, especially where wood members, drywall edges, and fastener points stay damp.
In your space, these pathways let damage extend beyond the original burst zone, so you need a coordinated inspection, not just a surface check.
You’re not dealing with a single wet spot; you’re managing a networked building system. When you understand these hidden paths, you can act faster, protect your home, and keep your recovery team aligned.
Fast Material Absorption
Porous building materials can absorb burst pipe water almost immediately, which is why damage spreads so quickly once a line fails.
You’ll see drywall, insulation, carpet padding, and wood framing pull in water through capillary action, so fast absorption starts before visible pooling ends. That means your walls, floors, and subfloor can stay saturated even after you shut off the supply.
Moisture retention then keeps raising the risk of swelling, warping, delamination, and microbial growth. If you act quickly, you protect your home, your project, and the people who live there.
Quick extraction, targeted drying, and dehumidification reduce how far the water travels and help you restore a safer, more stable indoor environment before hidden damage compounds.
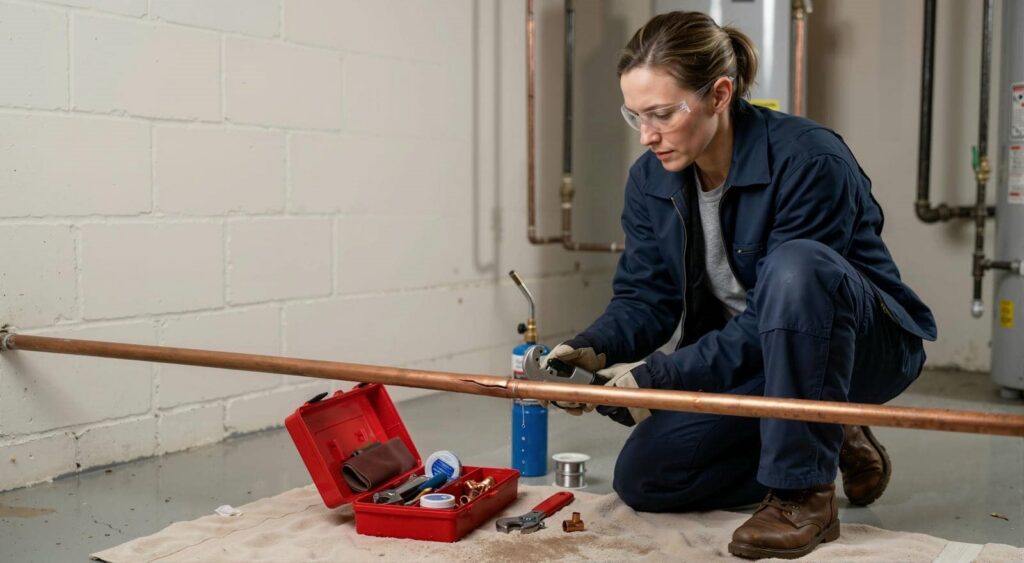
Shut Off the Water and Stop the Leak
Move quickly to shut off the main water supply as soon as you detect a burst pipe, because every second of flow increases water damage.
Then confirm the valve is fully closed and test nearby fixtures to verify the line has stopped moving water.
During leak detection, trace the source only after the flow ends, so you can assess the break without adding pressure or spread.
In your emergency response, isolate affected branches and shut down appliances connected to the line.
If the valve won’t turn or you can’t locate it, contact your utility or a licensed plumber right away.
Acting as a team with clear steps helps you protect your home, limit structural impact, and keep your response focused, efficient, and safe.
Remove Standing Water Quickly
Extract standing water as soon as possible to slow further damage and reduce the risk of mold growth.
You should begin water removal with a wet vacuum, pump, or professional extraction equipment, depending on the depth and spread. Move efficiently across affected rooms, and empty containers before they overflow.
If you live in a home with others, coordinate tasks so everyone stays safe and the job goes faster.
Focus on moisture control by removing water from floors, rugs, and low areas where it can collect. Don’t let puddles sit, because even short delays can increase material damage and contamination.
After extraction, check for hidden pooling near baseboards and under furniture. Acting quickly helps you protect your space and keeps you on track with the rest of mitigation.
Dry Walls, Floors, and Hidden Spaces
You need to dry wall cavities, floors, and hidden spaces immediately after the standing water is removed.
Use targeted air movement, dehumidification, and moisture meters to verify that framing, subfloors, and enclosed voids are returning to safe moisture levels.
Don’t overlook concealed areas, since trapped moisture can drive structural damage and microbial growth even when visible surfaces seem dry.
Drying Wall Cavities
After standing water is removed, wall cavities, subfloors, and other hidden spaces still hold moisture that can drive mold growth and structural damage if they aren’t dried quickly.
You need moisture detection to confirm what your eyes can’t see and to track progress accurately. Use targeted airflow, dehumidification, and insulation techniques that let trapped vapor escape without overloading the assembly.
- Open access points and measure moisture at multiple depths.
- Run air movers to push dry air through cavities.
- Remove wet insulation only when it’s saturated or collapsed.
You’ll work more confidently when you document readings and adjust equipment until materials return to safe levels.
This approach keeps your space healthier, your team aligned, and your cleanup efficient.
Protecting Hidden Spaces
Hidden moisture in walls, floors, and other enclosed spaces can keep a burst pipe loss active long after visible water is gone. You need to open access points, inspect framing, and verify moisture readings in every hidden cavity.
Use targeted air movement, dehumidification, and heat to protect dry walls and subfloors without overdriving materials. Check insulation concerns, since wet insulation traps water and slows evaporation.
If you leave pockets untreated, you can get odor, mold, and structural damage that spread beyond the original leak. You’re part of a crew that knows fast, methodical drying matters, so document readings and confirm each space reaches safe levels.
That approach helps you restore the building cleanly and confidently, with fewer surprises later.
Prevent Mold After a Burst Pipe
Even a brief delay after a burst pipe can allow mold to begin colonizing wet materials, so fast drying and moisture control are essential. You can protect your space and your neighbors’ peace of mind by acting methodically.
Focus on mold prevention with these steps:
- Remove standing water quickly with pumps, wet vacs, or absorbent materials.
- Increase airflow using fans and dehumidifiers until surfaces feel dry.
- Inspect porous items; discard anything that stays damp or smells musty.
Keep indoor humidity low and check concealed areas daily, because hidden dampness can reignite growth.
If you document conditions and maintain moisture control, you reduce spore spread and support a safer recovery. Acting early helps you stay confident, connected, and in control.
Protect Your Pipes, Wiring, and Walls
Shut off power to any affected circuits and isolate the damaged plumbing line before water can spread into walls, insulation, or electrical components.
You’ll reduce short-circuit risk and limit hidden moisture that weakens framing. Check nearby outlets, junction boxes, and fixtures for dampness, then keep the area clear so you can monitor changes.
If the leak came from freezing, inspect pipe insulation and add more where cold air reaches exposed runs. Watch water pressure, because excessive force can reopen a repaired joint or stress older pipe fittings.
You should also dry wall cavities fast to protect drywall, studs, and fasteners from corrosion.
When you act quickly, you help your home stay safe, stable, and part of a well-protected space.
How Pros Handle Burst Pipe Damage
Pros assess the full extent of burst pipe damage by locating the source, stopping the leak, and mapping moisture migration with meters and thermal imaging. You get an emergency response that stabilizes the site fast and keeps secondary damage down.
During a professional assessment, the team documents affected materials, checks saturation depth, and notes structural risks so you know exactly what needs attention.
- They isolate wet zones and protect adjacent rooms.
- They extract standing water and set targeted drying equipment.
- They verify moisture levels until readings return to safe thresholds.
You stay informed through clear updates, and the crew works with your space, not against it. That precision helps your home recover cleanly, with less disruption and fewer surprises.
How to Prevent Future Burst Pipes
Once the damage is under control, you can lower the chance of another burst by addressing the pipe conditions that typically cause failures.
You should install pipe insulation on exposed lines, especially in attics, crawlspaces, and exterior walls, to limit freeze risk. Use temperature monitoring near vulnerable plumbing so you can spot dangerous drops early.
Schedule routine inspections to check joints, valves, and corroded sections before small defects spread. Add seasonal maintenance before winter and after thaw cycles to verify drainage, shutoff access, and drain-down procedures.
Confirm pressure regulation at the meter and replace faulty regulators to prevent stress on fittings. If leak detection alarms or visible staining appear, act fast.
You’ll also want pipe replacement for aging material, and you should address water hammer with arrestors and secure piping.
Frequently Asked Questions
Does Burst Pipe Water Damage Affect Insurance Claims?
Yes, burst pipe water damage can affect your insurance claims; your insurance coverage may pay if you report promptly and document loss well. You’ll strengthen the claim process, reduce disputes, and protect your community’s recovery.
How Much Does Professional Water Mitigation Usually Cost?
You’ll usually pay $1,000-$4,000 for professional water mitigation, depending on loss size. Emergency response, drying, and repairs drive costs. You can lower expenses with water damage prevention, and you’ll feel supported when you act fast.
Can Burst Pipe Water Damage Weaken Home Foundations?
Yes, burst pipe water damage can weaken your home’s foundations. You’ll need swift moisture control, thorough drying, and structural inspection to protect foundation integrity. When you act early, you’re safeguarding your home and your peace of mind.
How Long Does a Water Mitigation Job Typically Take?
You’ll usually finish a water mitigation job in 3-5 days, though larger losses take longer. Technicians perform water extraction first, then monitor the drying process until moisture levels return to safe, stable conditions.
Should I Call a Plumber or Mitigation Company First?
Call the mitigation company first; they’ll handle emergency response and set repair priorities. You’ll stop damage faster, while the plumber fixes the leak. Think of it as triage: protect your home, then restore plumbing.
Recap
You can’t treat a burst pipe as a simple wet spot; it’s a fast-moving threat to walls, wiring, and indoor air. The longer you wait, the farther water travels through hidden cavities and the greater the risk of mold, rot, and costly repairs. Act quickly, shut off the source, and dry every affected space. With prompt mitigation, you don’t just clean up damage—you protect your home’s structure, safety, and long-term value.