
Storm damage cleanup starts with safety, not speed. You need to check for hazards, stop any active water intrusion, and document everything before you move debris or dry materials. The first hours matter because hidden moisture, unstable structures, and mold can escalate fast. If you handle the early steps in the right order, you’ll reduce damage and protect your claim. The next actions can make the difference between recovery and costly setbacks.
Key Takeaways
- Check for hazards like downed power lines, gas leaks, and unstable structures before entering the damaged area.
- Wear protective gear, shut off power, and remove standing water with pumps, wet vacs, or buckets as soon as it is safe.
- Photograph wide shots and close-ups of all damage, saving dated images for insurance claims and cleanup records.
- Dry walls, floors, and belongings within 24 to 48 hours using fans, dehumidifiers, and open airflow paths.
- Sort items into salvageable, repairable, and unsalvageable groups, and call professionals for structural risk or major damage.
Check for Safety Hazards First
Before you start storm damage cleanup, check for immediate safety hazards such as downed power lines, gas leaks, unstable structures, standing water, and broken glass.
You should never enter a damaged area until you’ve assessed it from a safe distance. Wear safety gear, including gloves, boots, eye protection, and a hard hat, to reduce injury risk.
Keep your emergency kit close so you can respond quickly if conditions change. If you notice sagging ceilings, cracked walls, or shifting debris, back away and call trained responders.
You belong in a cleanup effort that puts people first, and that means treating every hazard as real. Stay alert, communicate clearly with others on site, and don’t rush.
Careful assessment protects you and everyone helping.
Stop the Water Source
Locate the leak quickly so you can identify whether water is entering from a roof line, pipe, appliance, or exterior breach.
Shut off the main supply or the affected branch valve immediately to stop additional flooding.
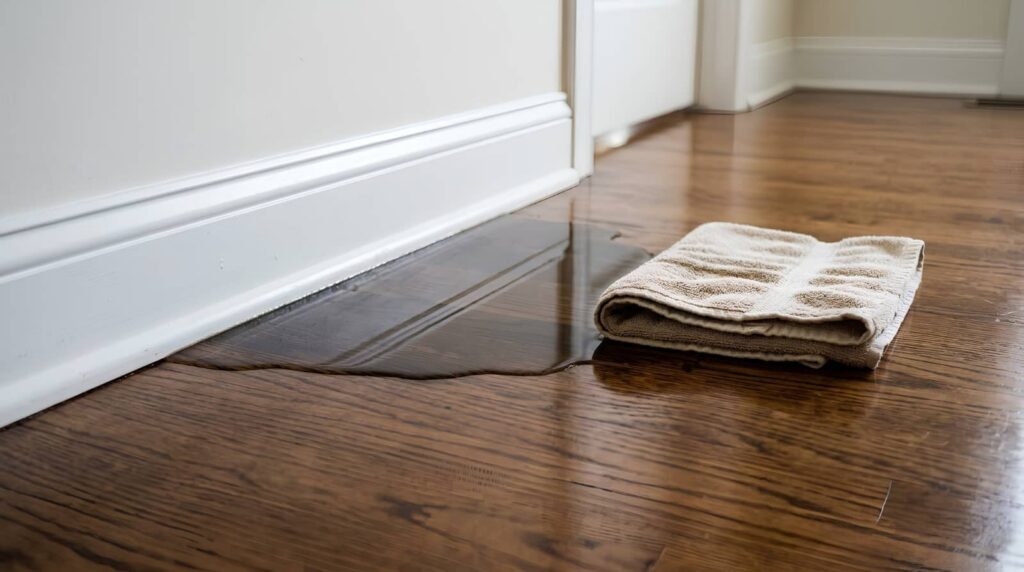
Protect nearby areas with tarps, towels, or barriers so you can limit spread while you finish cleanup.
Locate the Leak
Once the storm passes, you need to stop the water at its source so the damage doesn’t spread.
Start with leak detection by tracing wet spots, drips, and stains back to the highest visible point. Check ceilings, attic framing, vents, flashing, and skylights, then move outside for a roof inspection.
Look for missing shingles, lifted edges, punctures, and debris that may have opened a path for water. Use a flashlight in dark spaces and mark every suspect area so your crew can stay organized.
If rain is still falling, you’re part of the team protecting the home, so work methodically and verify each finding.
Once you locate the entry point, keep the area monitored and documented for cleanup.
Shut Off Supply
Shut off the water supply as soon as you confirm a leak or broken line. Turn the main valve clockwise until it stops, and don’t force it.
If you can’t access the valve safely, call your emergency contacts right away and report the issue. You should also notify your utility provider so they can advise on utility assistance and next steps.
Keep your phone charged and document the valve location for your household, so everyone knows where to act during the next storm.
If the leak involves a meter, service line, or shared system, wait for trained crews before you proceed.
Protect Nearby Areas
After you stop the source, protect the surrounding area by moving valuables, electronics, and absorbent materials away from the leak path. You’ll limit spread and keep cleanup manageable.
Set storm barriers at doorways, vents, and low openings to slow incoming water and debris. Cover furniture, flooring, and stored items with protective coverings that resist tearing and wick less moisture.
Lift items onto blocks or shelves so they stay above pooled water. Keep cords, tools, and extension strips clear of damp zones to reduce shock risk.
If you share the space with others, assign one person to monitor changes and another to document damage. Quick coordination helps your team stay safe, organized, and ready for the next step.
Remove Standing Water Fast
Standing water can keep damaging your property fast, so you need to remove it as soon as it’s safe to do so. Use pumps, wet vacs, and buckets for water removal techniques that match the depth and area you’re facing.
Start at the lowest point and work outward so you don’t spread contamination or weaken materials. Wear protective gear, shut off power to affected zones, and keep everyone clear of slick surfaces.
Once you’ve extracted the bulk water, open windows if weather allows and run fans and dehumidifiers for effective drying methods.
Check carpets, baseboards, and hidden cavities for trapped moisture. You’re not handling this alone; follow a disciplined process, and you’ll help your home recover faster and reduce long-term damage.
Take Photos for Your Insurance Claim
Take wide-angle photos first so you can show the full scope of the storm damage and the affected areas.
Then record close-up images of specific damage, including structural issues, water intrusion, and ruined contents.
Save dated copies of every file so you’ve got a clear time-stamped record for your insurance claim.
Capture Wide-Angle Shots
Before you move or discard anything, photograph the storm damage from multiple wide-angle angles so your insurance adjuster can see the full scope of the loss.
Use wide angle photography to frame the entire room, roofline, yard, and adjacent structures in one shot. Stand in corners, doorways, and across the street when safe, and keep the camera level to avoid distortion.
Capture the storm aftermath in daylight if possible, and include landmarks that prove location and scale. Take several images from each position so you can select the clearest set later.
These broad views help establish the context of the damage and strengthen your claim package. Stay organized, label files by area, and keep the original, unedited versions backed up in case your insurer requests them.
Document Close-Up Damage
After you’ve captured the wider scene, move in and photograph each item of damage up close so your insurance claim shows the full extent of the loss. Focus on cracks, dents, torn roofing, water stains, warped materials, and broken fixtures.
Include multiple angles and clear reference points so adjusters can verify scale and location. Pair each photo with a brief note naming the room, structure, or object, and identify document types such as receipts, estimates, or maintenance records that support your damage assessment.
Keep the lighting even and avoid blurry images. You’re not just recording loss; you’re building a shared, credible case for recovery with your insurer and your storm response team.
Prioritize accuracy, consistency, and direct evidence.
Save Dated Image Copies
Save dated copies of every image as soon as you capture them so your insurance claim has a verifiable time record. You should keep the original file metadata intact, because it supports loss verification and strengthens your claim packet.
Build a simple image organization system with folders named by room, damage type, and date. Add brief labels in the file names, but don’t edit the evidence image itself.
Create a digital backup on a cloud drive and an external device, then confirm both copies open correctly. If you’re working with neighbors after the storm, share your process so everyone can document damage with the same discipline.
When adjusters review your photos, clear timestamps and organized files help them move fast and validate what you’ve lost.
Dry Out Walls, Floors, and Contents
Once the area is safe, begin removing standing water and use fans, dehumidifiers, and open pathways for airflow to dry walls, floors, and contents as quickly as possible.
Prioritize moisture removal in the first 24 to 48 hours, because delays increase structural damage and mold risk. Aim airflow across wet surfaces, not straight at them, and keep windows open only when outside air is drier than indoor air.
Use drying techniques that target hidden cavities: remove baseboards, drill small vent holes where needed, and check insulation and subfloors for trapped dampness.
Monitor humidity with a meter and keep readings low until materials stabilize. Stay consistent, document progress, and work as a team so your cleanup stays organized, safe, and effective.
Salvage Usable Belongings Carefully
Sort your belongings by damage level, separating salvageable items from those that need disposal.
Clean and disinfect usable items before you store them to reduce contamination and mold risk.
Inspect each piece for hidden damage, because moisture can weaken materials and create failures later.
Sort Items by Damage
Start by separating damaged items into clear categories: salvageable, repairable, and unsalvageable. This damage assessment helps you make fast, defensible decisions and supports item prioritization when supplies are limited.
Place intact belongings together, then flag pieces with minor structural, electrical, or water exposure for closer review. You should move through each room methodically, labeling boxes and taking quick notes so you can track what stays, what needs service, and what goes.
Keep fragile keepsakes, documents, and trusted essentials in a protected area of your recovery space. When you sort this way, you reduce confusion, protect emotional anchors, and help your household regain order.
Work carefully, stay consistent, and trust the process; clear sorting now makes every next step easier for you.
Clean Before Storing
Before you store any salvageable item, clean it thoroughly and let it dry completely to prevent mold, corrosion, and lingering contamination.
Use fresh cleaning supplies, gloves, and safe detergent for each material type, and change water often so you don’t spread residue. Wipe hard surfaces, launder washable fabrics, and air-dry contents in a clean, well-ventilated space.
Once dry, place items in durable storage solutions that seal out dust and moisture. Label each container so you can find what you need fast and keep your recovery organized.
Pack similar items together, and avoid overcrowding so air can circulate. By handling belongings carefully now, you protect the things that matter and make your cleanup team stronger, calmer, and more in control.
Inspect for Hidden Harm
Once items are clean and dry, inspect each one for hidden damage before you put it back into service or storage. Check seams, joints, wiring, and fasteners for swelling, corrosion, cracks, or warping. You should also smell for mildew and test moving parts for binding. If you spot hidden damage, set the item aside and label it clearly.
- Examine electronics for moisture intrusion before energizing.
- Verify furniture integrity so weak frames don’t fail later.
- Inspect containers and tools for contamination or structural loss.
- Document findings to support emergency preparedness and replacement planning.
When you work methodically, you protect your household, reduce waste, and keep your recovery team aligned.
Trust your judgment, and don’t rush salvage decisions.
Clean and Disinfect Storm Debris
When you handle storm debris, clean hard surfaces first and then disinfect anything contaminated by floodwater, sewage, or mold.
Wear gloves, boots, and eye protection so you stay safe while you sort materials.
Separate salvageable items from trash, and follow local debris disposal rules for bagging, staging, and pickup.
Use cleaning techniques that remove dirt before disinfection, because organic residue weakens sanitizers.
Wash surfaces with soap and water, rinse well, then apply an EPA-registered disinfectant at the labeled contact time.
Replace heavily porous items that can’t be fully cleaned.
Keep work zones ventilated, and wash your hands and tools often.
Inspect for Mold Growth Early
After storm cleanup, inspect damp areas right away so mold doesn’t spread behind walls, under flooring, or inside insulation. You need early detection techniques that spot staining, musty odors, and soft drywall before growth accelerates.
Check closets, crawl spaces, and around windows where moisture lingers. Use mold prevention methods like rapid drying, ventilation, and removing wet materials to reduce risk. Stay systematic so your team feels confident and protected.
- Look for discoloration on surfaces.
- Test hidden spaces with a flashlight.
- Track humidity in enclosed rooms.
- Dry affected areas within 24 hours.
If you catch mold early, you limit contamination and keep repairs simpler. Keep notes on each finding so everyone on your crew stays aligned and accountable.
Call a Storm Damage Cleanup Pro
If the damage goes beyond minor debris, call a storm damage cleanup pro to assess structural risks, water intrusion, and hidden hazards.
You’ll get a trained team that can document damage, prioritize safety, and use specialized extraction and sanitation methods.
A pro can also help you interpret insurance coverage, so you know what your policy may reimburse and what records you need. That guidance can reduce delays and avoid costly mistakes.
You’ll also get a clearer estimate of cleanup costs before work starts, which helps you plan with confidence.
When you bring in an experienced crew, you’re not handling recovery alone; you’re working with people who understand the process and can help your household restore order efficiently.
Seal Openings to Prevent More Damage
Once the damage has been assessed, seal any exposed openings right away to block rain, wind, pests, and further debris from getting inside. Use temporary seal types that match the material: plastic sheeting for windows, plywood for large breaks, and roofing tape for minor tears.
Choose sealing techniques that create a tight, weather-resistant barrier without trapping moisture. You’ll protect your space and keep cleanup moving with your crew.
- Inspect every gap before you start.
- Fasten covers securely to avoid lift.
- Check corners, seams, and edges.
- Replace weak seals after each storm event.
Work methodically, because even small openings can cause hidden structural damage and mold growth.
When you seal correctly, you protect your home and support a safer recovery for everyone involved.
Frequently Asked Questions
How Soon Should I File My Insurance Claim After Storm Damage?
File your claim as soon as you can, ideally within 24 to 72 hours. You’ll meet insurance timelines, preserve claim documentation, and protect your coverage. Act fast, and you’ll stay connected to the process.
Can I Clean Storm Debris With Bleach and Water?
Yes, you can, but bleach isn’t magic. You’ll use proper cleaning solutions, follow safety precautions, and avoid mixing chemicals. Wear gloves, ventilate the area, and clean only nonporous debris you can safely handle.
Should I Turn off Electricity Before Entering Flooded Rooms?
Yes, you should turn off electricity before entering flooded rooms. You’ll reduce electrical hazards and improve flood safety. If you can’t reach the breaker safely, stay out and call your utility or emergency services immediately.
What Items Should Never Be Saved After Severe Water Damage?
You shouldn’t save soaked drywall, insulation, mattresses, carpets, and any porous personal belongings; mold growth starts fast. Like a damp scroll from antiquity, they’re unsalvageable. Discard them, disinfect hard surfaces, and document losses.
How Do I Prevent Lingering Odors After Cleanup?
Use odor neutralizers and ventilation techniques immediately after cleanup. You should remove damp materials, dry surfaces fast, and run fans or dehumidifiers. Seal porous debris only after odors stop, so your space feels clean and included.
Review
When you handle storm damage cleanup, you prove a simple theory: fast, systematic action limits loss. You should check for hazards first, stop the water source, and remove standing water immediately. Then dry affected areas, document every detail for insurance, and disinfect debris. You need to inspect for mold early and seal openings before more damage starts. If the damage is beyond your scope, call a storm damage cleanup pro.