
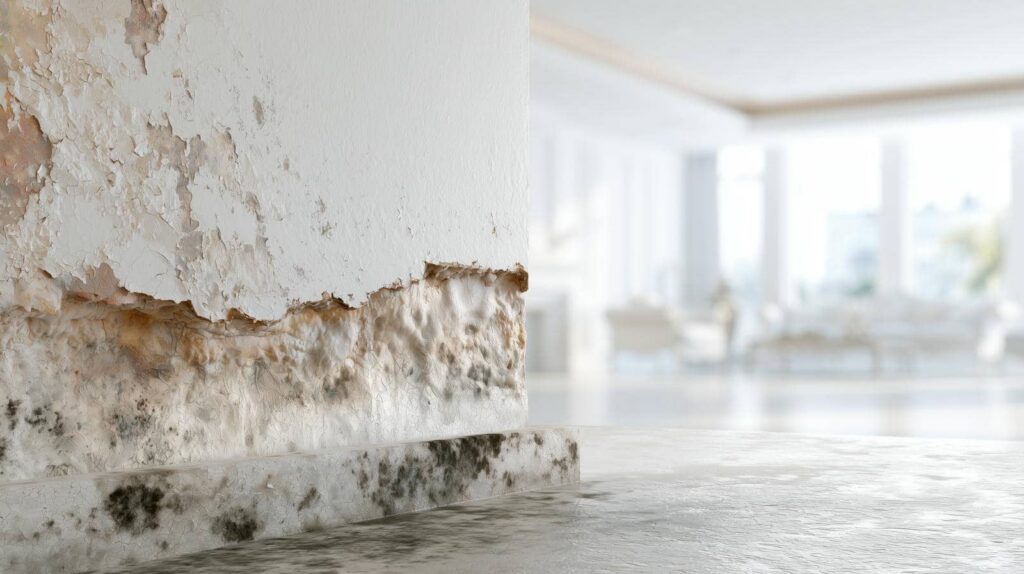
Mold Inspection is essential after a burst pipe because it can turn a room into a hidden mold lab in hours. You should inspect the pipe area first, then check walls, floors, insulation, and any concealed cavities for moisture, staining, or warping. Use a moisture meter, note musty odors, and document every affected material before you disturb anything. The next step can determine whether you face a simple dry-out or a full remediation.
Key Takeaways
- Inspect walls, floors, baseboards, insulation, and fixtures for staining, swelling, soft spots, or visible mold.
- Use a flashlight and moisture meter to check hidden cavities, flooring, and insulation for concealed dampness or growth.
- Note musty odors, discoloration, bubbling paint, and irregular stains as signs of possible mold contamination.
- Document all findings with photos, locations, moisture readings, and dates for tracking and remediation planning.
- Call mold remediation professionals quickly, contain affected areas, and avoid disturbing materials before drying is complete.
Inspect the Burst Pipe Area
Start with a careful visual inspection of the burst pipe area, checking walls, floors, baseboards, insulation, and nearby fixtures for visible moisture, staining, swelling, or mold growth.
You should document each finding with notes and photos so your team can compare conditions later.
Next, verify that the pipe has fully stopped leaking and that surrounding materials feel dry to the touch.
If you spot damaged drywall, warped trim, or persistent dampness, mark those sections for immediate remediation.
Keep the area ventilated while you assess, and avoid disturbing materials unnecessarily.
These steps support preventative measures and improve pipe maintenance by helping you identify weak points before they spread.
When you act methodically, you protect your space and stay aligned with a careful, informed crew.
Look for Hidden Mold After Water Damage
Once the visible wet areas are documented, you should check for hidden mold in cavities, behind baseboards, under flooring, and inside insulation where moisture can linger after water damage.
Use a flashlight, mirror, and moisture meter to verify suspect zones, and note any musty odor, staining, or soft material. If you find concealed dampness, assume mold growth may have started and inspect adjacent voids with care.
You’re part of a team when you work methodically, because early detection protects everyone in the space. Limit disturbance until you’ve recorded conditions, since agitation can spread spores and increase health risks.
Bag any removed samples, label each location, and separate affected materials from clean areas so you can keep the inspection organized and defensible.
Check Walls, Floors, and Insulation
You should inspect wall surfaces for staining, swelling, soft spots, and seam separation that indicate moisture intrusion.
Check floors with a moisture meter and look for warping, buckling, or concealed dampness at edges and subfloors.
Examine insulation for compression, discoloration, or odor, since damaged insulation often traps moisture and supports mold growth.
Wall Surface Detections
Check walls, floors, and insulation for visible water intrusion, staining, bubbling paint, warping, and softened or swollen materials, since these surface changes often reveal where moisture migrated after a pipe burst.
You should inspect each wall section with steady lighting and document any paint discoloration, efflorescence, or seam separation.
Use wall texture analysis to compare smooth, rough, and blistered areas; irregular texture often marks hidden saturation.
Probe suspect drywall lightly with a clean tool to confirm loss of rigidity without breaking the surface.
If insulation is exposed, verify whether it’s compressed, darkened, or matted.
Mark every affected zone so your team can share a consistent map of concern.
This method helps you catch early mold indicators and keeps your inspection focused, accurate, and aligned.
Floor Moisture Checks
Inspect floor surfaces for pooling, damp seams, cupping, buckling, discoloration, and softened subflooring, because burst-pipe moisture often spreads laterally before it becomes visible on walls.
You should map affected zones by floor types, then test the perimeter and center of each room with a moisture meter. Compare readings against dry reference areas, and note any gradients that suggest hidden moisture sources.
On tile, check grout lines and base edges; on wood, inspect joints and finish failure; on carpet, lift corners and assess padding.
Verify that readings stay elevated only where water traveled, not where prior cleaning left residue.
Document each finding with photos, measurements, and room location so your team can coordinate the next repair step confidently and efficiently.
Insulation Damage Signs
Start with a layered inspection of wall cavities, floor assemblies, and any exposed insulation, because burst-pipe moisture can saturate these materials long before surface damage becomes obvious.
You should document each zone, then compare insulation types for matting, discoloration, and odor. In our field, careful checks help you protect the space and keep the team aligned.
- Fiberglass that sags or clumps
- Cellulose that feels dense or damp
- Foam boards with warped edges or dark staining
Probe nearby sheathing and joists for soft spots, then trace condensation issues around cold pipes, seams, and penetrations.
If you find persistent dampness, remove compromised insulation, dry the cavity, and verify that adjacent finishes are stable before reinstalling.
Watch for Musty Odors and Stains
A persistent musty odor often reveals hidden moisture long before visible damage appears, so you should document any damp, earthy smell near walls, floors, baseboards, or cabinetry after a pipe burst.
If the musty smells intensify in enclosed rooms, treat them as probable mold sources and mark each location for follow-up.
Then inspect nearby surfaces for discoloration, especially brown, green, or black staining on drywall, trim, and caulk.
Note irregular edges, watermark rings, and any paint bubbling, since these stains often track moisture pathways.
Use a flashlight and a clean notebook to record exact placement, size, and color.
Test Moisture Before Repairs
Before you repair any damaged area, verify that the moisture has dropped to a safe level with a calibrated moisture meter. You’ll use moisture testing to confirm the substrate is dry enough for repair readiness, not just dry to the touch.
Measure framing, drywall edges, and flooring at several points, then compare readings with unaffected areas nearby. If values remain elevated, keep drying equipment running and retest.
- Check both surface and deeper readings.
- Repeat tests after airflow changes.
- Repair only when readings match baseline.
This procedure helps you join a careful inspection team that prevents trapped moisture, hidden decay, and future mold growth.
When your measurements are stable, you can move forward with confidence, knowing the area’s conditions support a durable repair.
Record Mold Inspection Findings
You should document the inspection with clear photo records that show affected materials, visible growth, and surrounding conditions.
You should log moisture readings at each tested location, including the exact values, instrument used, and measurement points.
You should add detailed notes on odors, damage patterns, and access limits so the findings stay traceable and actionable.
Photo Documentation
Photograph each affected area as you inspect it so you can preserve a clear record of visible mold growth, moisture patterns, staining, and material damage. Use consistent framing, sharp focus, and scale references so your photo analysis supports reliable comparison later.
Apply the same documentation techniques in every room, and keep your team aligned on sequence and labeling.
- Capture wide shots first, then close-ups of each anomaly.
- Include date, location, and orientation in every file name.
- Photograph adjacent clean surfaces to show contrast.
This method helps you verify what you saw, communicate findings clearly, and maintain confidence in the inspection record.
When you follow a disciplined process, you strengthen shared accountability and make the next remediation steps easier for everyone involved.
Moisture Readings
After you’ve documented the visible damage, measure moisture at each affected material and surrounding clean areas to map the full extent of water intrusion.
Use calibrated meters and consistent testing techniques so you can compare readings across drywall, framing, flooring, and insulation.
Note elevated values near likely moisture sources, such as the burst line, baseplates, and concealed cavities, then confirm where readings return to baseline.
Take measurements at fixed intervals and repeat them from the same positions to keep your findings reliable.
This process helps you separate active wet zones from areas that only show surface dampness.
Share results with your team so everyone works from the same field data and can align containment, drying, and inspection priorities quickly and confidently.
Detailed Notes
Detailed notes should capture every mold-related observation in a clear, organized format, including affected materials, estimated extent, odor, visible growth patterns, moisture readings, environmental conditions, and the exact locations where each finding was made.
You’ll build a reliable record that supports remediation, helps your team stay aligned, and reduces health risks for everyone involved. Use consistent terminology and date every entry.
- Note substrate type, square footage, and access limits.
- Document photos, sample IDs, and instrument readings.
- Record preventive measures already in place and needed next.
When you log findings immediately, you create a traceable field report that guides decisions, confirms scope, and supports safe return planning.
Keep your notes factual, complete, and easy for others to follow.
Call Mold Remediation Experts Fast
Call mold remediation experts fast so they can assess the moisture source, contain affected areas, and prevent spores from spreading through the building.
You should trigger emergency response immediately after the burst, because every hour of delay increases colonization risk. A professional assessment will verify hidden saturation in walls, subfloors, insulation, and HVAC components.
You’ll also get a documented scope for drying, removal, and clearance testing, which helps your team stay coordinated and informed. Ask the crew to set containment, use negative air pressure, and map affected materials before demolition starts.
If you act quickly, you reduce structural damage, protect indoor air quality, and keep your home or facility safe for everyone who belongs there.
Frequently Asked Questions
How Soon Should Mold Testing Begin After a Pipe Burst?
You should begin mold testing within 24–48 hours after a pipe burst, because mold growth can start quickly. Your inspection timeline should be immediate, after water removal, so you’ll protect your space and team.
Can Mold Start Growing Within 24 Hours of Water Exposure?
Yes—mold can start growing within 24 hours after water exposure; like an alarm, it signals trouble fast. You should dry affected materials immediately, inspect hidden cavities, and document water damage to limit mold growth.
What Protective Gear Is Needed During Mold Inspection?
You need protective clothing, respirator masks, gloves, goggles, and sealed boots during mold inspection. You’ll reduce exposure, follow safe procedures, and protect your team while checking contaminated areas for hidden growth.
Should HVAC Systems Be Checked for Mold Contamination?
Yes, you should check HVAC systems for hidden growth. During HVAC maintenance, inspect coils, drain pans, and ducts, then sample suspect areas. You’ll protect air quality, support your crew, and catch contamination early.
Is Professional Air Sampling Necessary After Pipe Damage?
Usually, you don’t need professional air sampling unless you can’t confirm contamination visually or with moisture readings. You should prioritize mold remediation, document findings, and verify air quality after drying, especially if occupants feel included and protected.
Recap
You’ve inspected the burst-pipe area, checked hidden mold, and verified walls, floors, and insulation. You’ve also tracked musty odors, tested moisture before repairs, and recorded every finding. Now act fast: if readings stay elevated or growth is visible, call mold remediation experts. Quick, careful follow-up keeps the problem from spreading like wildfire and helps protect the structure, indoor air quality, and repair timeline. With thorough documentation, you can move from damage control to recovery.