
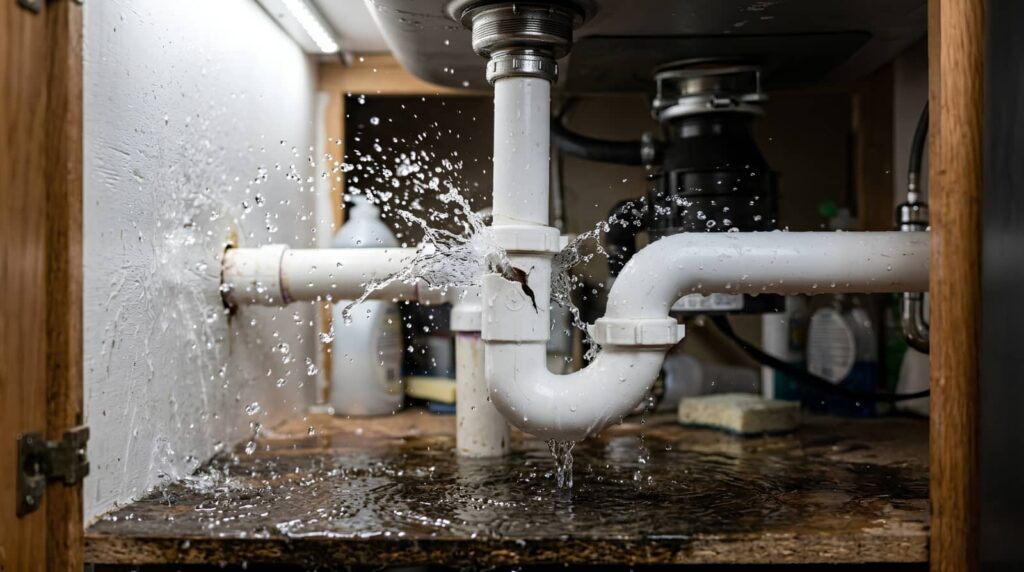
When you shut off the water, turn off the power, and move dry items out of the way, you cut the damage fast and safely. Burst Pipe cleanup involves removing standing water, drying the structure, cleaning and disinfecting surfaces, and watching for mold. The last step is knowing when the pipe problem is bigger than your tools, and that’s where professional help can make the difference.
Key Takeaways
- Shut off the main water valve immediately to stop flooding and limit further damage.
- Turn off electricity if water reaches outlets, appliances, or wiring to avoid shock hazards.
- Remove standing water quickly with towels, mops, a wet/dry vacuum, or a sump pump.
- Dry the area fast using fans, dehumidifiers, and open ventilation to prevent mold growth.
- Check for hidden damage, warping, or musty odors, and call a water damage professional if needed.
Stop the Water at the Burst Pipe
First, shut off the water at the burst pipe as quickly as you can.
Then close the nearest isolation valve, or the main valve if needed, to stop further flooding.
Keep a bucket and towels ready, and use your emergency supplies to control minor runoff while you assess the damage.
If the break is small and accessible, you can wrap it temporarily with a pipe repair clamp or repair tape, but treat that as a short-term fix only.
Stay calm and work methodically; you’re not handling this alone.
Check for steady dripping, listen for pressure changes, and confirm the flow has stopped.
Once the leak is contained, call a licensed plumber and prepare the area for cleanup.
Your quick action protects your home and helps your household stay in control.
Turn Off Power and Protect What’s Dry
If water is near outlets, appliances, or your breaker panel, shut off electricity at the main breaker if you can do it safely.
Move dry belongings, furniture, and electronics out of the affected area before they wick up moisture.
Keep dry items elevated and away from wet floors until you’ve confirmed the area is safe.
Shut Off Electricity
Shut off power to the affected area right away to reduce the risk of electrocution, especially if water has reached outlets, appliances, or exposed wiring.
You’re taking essential safety precautions when you cut electricity at the breaker, not the wet switch. If you’re unsure which circuit controls the room, turn off the main power and call a licensed electrician.
Keep your hands dry, stand on a dry surface, and avoid any contact with standing water near cords or devices. This step helps you control electrical hazards before cleanup starts.
Once the area is de-energized, you can work with more confidence and protect the dry parts of your home.
Stay alert, follow the plan, and keep your crew aligned on the next move.
Move Dry Belongings
After you’ve cut the power, move dry belongings out of the affected area before cleanup spreads water or debris.
Prioritize furniture relocation for lightweight pieces, then lift rugs, boxes, and electronics onto a dry, stable surface. Keep personal items in sealed bins or bags so moisture can’t reach them.
Work from the driest zone toward the wettest, and don’t drag items across soaked floors; it can spread contamination and damage finishes. If an object is too heavy, ask for help and use proper lifting technique to avoid injury.
Leave wet furniture in place only if moving it risks collapse. Set aside labeled storage so your household stays organized and your team can keep working efficiently.
Remove Standing Water Quickly
Standing water can spread damage fast, so you should remove it as soon as it’s safe to do so.
Use a wet/dry vacuum, sump pump, or mop-and-bucket setup for standing water removal, depending on depth and access. Work from the lowest point toward the exit so you don’t trap more water.
Empty containers often and keep hoses clear to maintain suction. If the water is contaminated, wear gloves and boots and dispose of runoff safely.
Open pathways for air movement and place fans nearby to support quick drying after bulk water is gone.
Check hidden pockets under appliances and furniture bases, because missed water can worsen cleanup.
Stay methodical, and you’ll keep the space safer for everyone in your home.
Dry Floors, Walls, and Baseboards
Start with floor drying by using air movers, fans, and absorbent towels to pull moisture out of the surface and seams.
Then remove wall moisture with a wet/dry vacuum, dehumidifier, and controlled airflow to speed drying without trapping dampness inside cavities.
Finish by drying baseboards with a microfiber cloth and focused airflow, and check for swelling or soft spots before you close up the area.
Floor Drying Methods
Once you’ve shut off the water and removed standing moisture, dry floors, walls, and baseboards with high-velocity air movers and dehumidifiers to speed evaporation and prevent warping, swelling, and mold growth.
Position airflow across the entire floor surface, then angle it along trim to lift trapped moisture. Match dehumidifier usage to the room size, and empty or drain units so they keep running continuously.
Check floor materials before you increase heat or airflow; hardwood, laminate, vinyl, and carpet each dry differently, so adjust your setup to avoid damage.
Lift rugs, pads, and furniture feet so air can circulate underneath. Monitor moisture with a meter until readings stabilize.
You’ve got this—steady drying now helps your space recover faster and keeps your cleanup crew on the same page.
Wall Moisture Removal
After the floors are dry, remove wall moisture by directing air movers at wet drywall, plaster, and trim, keeping airflow close enough to pull damp air off the surface without causing damage.
You should check each wall with moisture detection equipment, then compare readings at different heights to spot hidden pockets. If the wall feels cool or shows a higher reading, keep drying until the levels match nearby dry sections.
Open cavities that expose wall insulation only when needed, so you can speed evaporation and confirm the insulation isn’t holding water.
Keep the room warm, and watch for swelling, staining, or soft spots. Recheck regularly, because trapped moisture can spread behind finishes.
When you stay methodical, you protect the structure and help the space return to normal safely.
Baseboard Drying Tips
Keep air movers aimed low along the baseboards so you can dry the floor edge, wall bottom, and trim without leaving trapped moisture behind.
Pull furniture away, then remove wet shoe molding and inspect seams for swelling or soft spots. If you’re working with MDF, vinyl, or wood baseboard materials, match drying time to the product so you don’t warp or delaminate it.
Use a moisture meter at joints and behind corners until readings stabilize. If the wall cavity stays damp, open targeted access points and continue airflow.
Clean residue, then seal gaps only after everything is dry. Good baseboard maintenance helps you protect your space, prevent odors, and keep the room feeling like yours.
Clean and Disinfect the Area
Scrub all affected surfaces with hot water and a heavy-duty cleaner to remove dirt, residue, and visible contaminants.
Then rinse thoroughly and let the area drain so disinfecting solutions can work evenly.
Use cleaning supplies that include gloves, microfiber cloths, buckets, and separate mops for contaminated zones.
Apply a registered disinfectant at the label’s contact time, covering floors, trim, cabinets, and any hard, nonporous surface that got wet.
Keep ventilation moving with open windows or fans, but don’t spread spray beyond the treated area.
Replace wash water often, and wipe from the cleanest section toward the dirtiest to limit cross-contamination.
If you’re methodical now, you’ll help your team restore a safer space and keep the cleanup on track for everyone involved.
Check for Mold After Cleanup
Once the area is clean and dry, inspect walls, baseboards, flooring, insulation, and any hidden cavities for mold growth or musty odors.
You’re checking for discoloration, fuzzy patches, or staining that may signal active moisture. Look closely at corners, seams, and behind trim where water can linger.
If you spot mold types like black, white, or green growth, note the location and size so you can track changes. Use a flashlight and a moisture meter if you’ve got one; elevated readings often mean trapped water remains.
Keep humidity low, run ventilation, and dry materials fast for mold prevention. If surfaces stay damp after cleanup, recheck them daily until everything feels fully dry and smells neutral.
Call a Water Damage Repair Expert
If the damage covers a large area, keeps returning, or affects drywall, insulation, wiring, or flooring, call a water damage repair expert right away.
You need a team that can assess moisture, stop hidden damage, and dry the structure with commercial equipment. They’ll check baseboards, subfloors, and wall cavities, then document conditions for insurance claims.
This helps you avoid missed repairs and extra costs. Professional restoration services also reduce mold risk and speed up recovery, so you can get your home back to normal with less stress.
Ask for an inspection, scope of work, and timeline before they start.
When you work with experienced pros, you’re not handling the mess alone—you’re joining a process built to protect your home.
Frequently Asked Questions
How Do I Know if My Insurance Covers Burst Pipe Damage?
Check your insurance policy for burst pipe coverage and exclusions, then call your insurer. You’ll confirm coverage limits, deductibles, and claim steps. If you’re unsure, ask for a written explanation to protect your home and interests.
Should I Replace Damaged Drywall After a Pipe Burst?
Yes, you should replace damaged drywall after a pipe burst if a moisture assessment shows saturation, warping, or mold risk. You’ll protect your home, restore integrity, and join others who prioritize safe, lasting repairs.
Can I Use a Shop Vacuum on Floodwater Safely?
You can use a shop vacuum on floodwater only if it’s rated for wet pickup; you’ll protect floodwater safety, compare vacuum types, and drain, dry, disinfect, and check cords before powering up.
How Long Does Burst Pipe Cleanup Usually Take?
Cleanup duration for a pipe burst usually takes 24 to 72 hours, but you’ll need longer if water’s spread, materials are soaked, or drying equipment runs continuously. You can speed recovery with prompt extraction and ventilation.
What Signs Mean Hidden Water Damage Is Still Present?
You’ll spot hidden water damage when walls feel like damp bread, paint bubbles, floors warp, odors linger, or mold growth appears. Check for soft spots, stains, and sagging; they can threaten structural integrity.
Final Thoughts
You’ve already done the hard part: you stopped the leak before it could turn your home into an indoor pool. Keep the power off, keep drying hard, and keep watching for stains or musty odors—the quiet clues that water never really leaves. If walls swell or mold appears, don’t wrestle it alone. Call a water damage repair expert and let the mess finally meet its match.